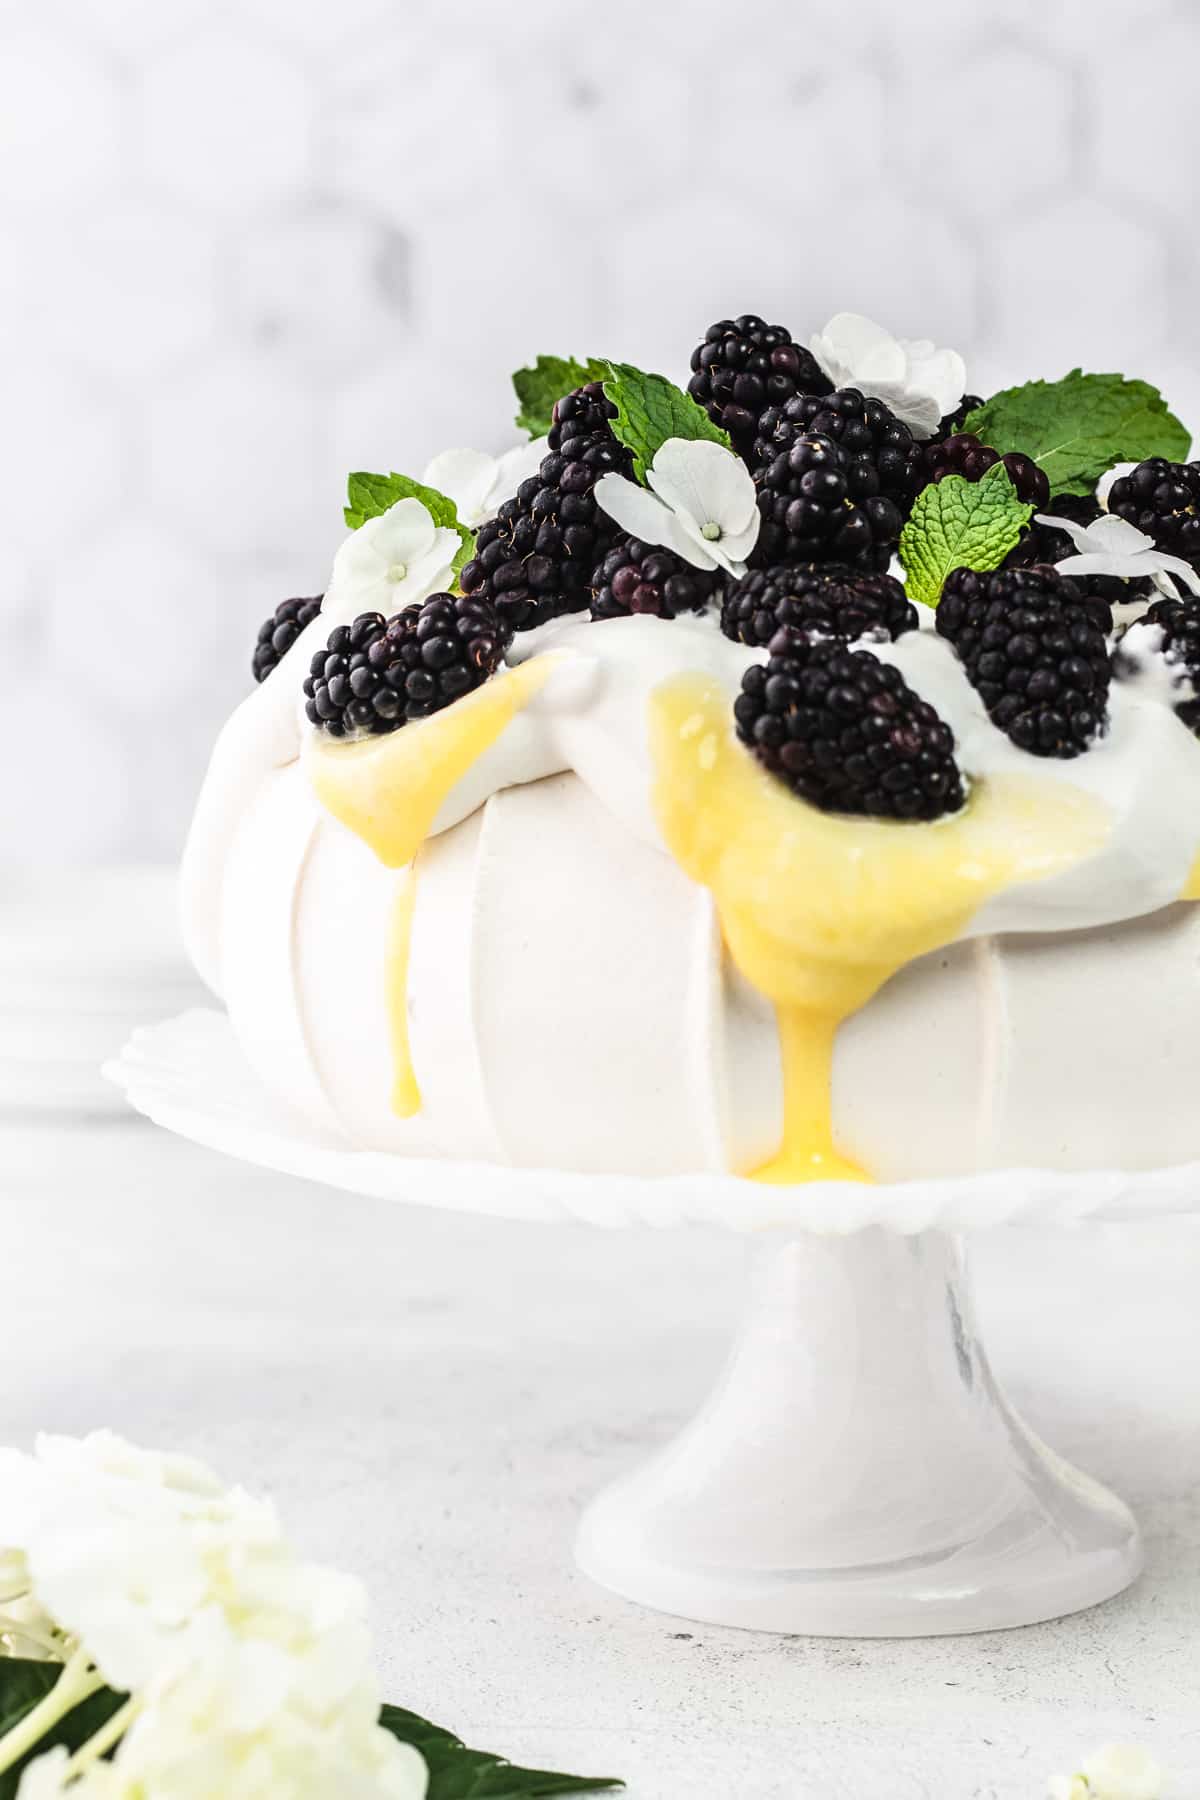
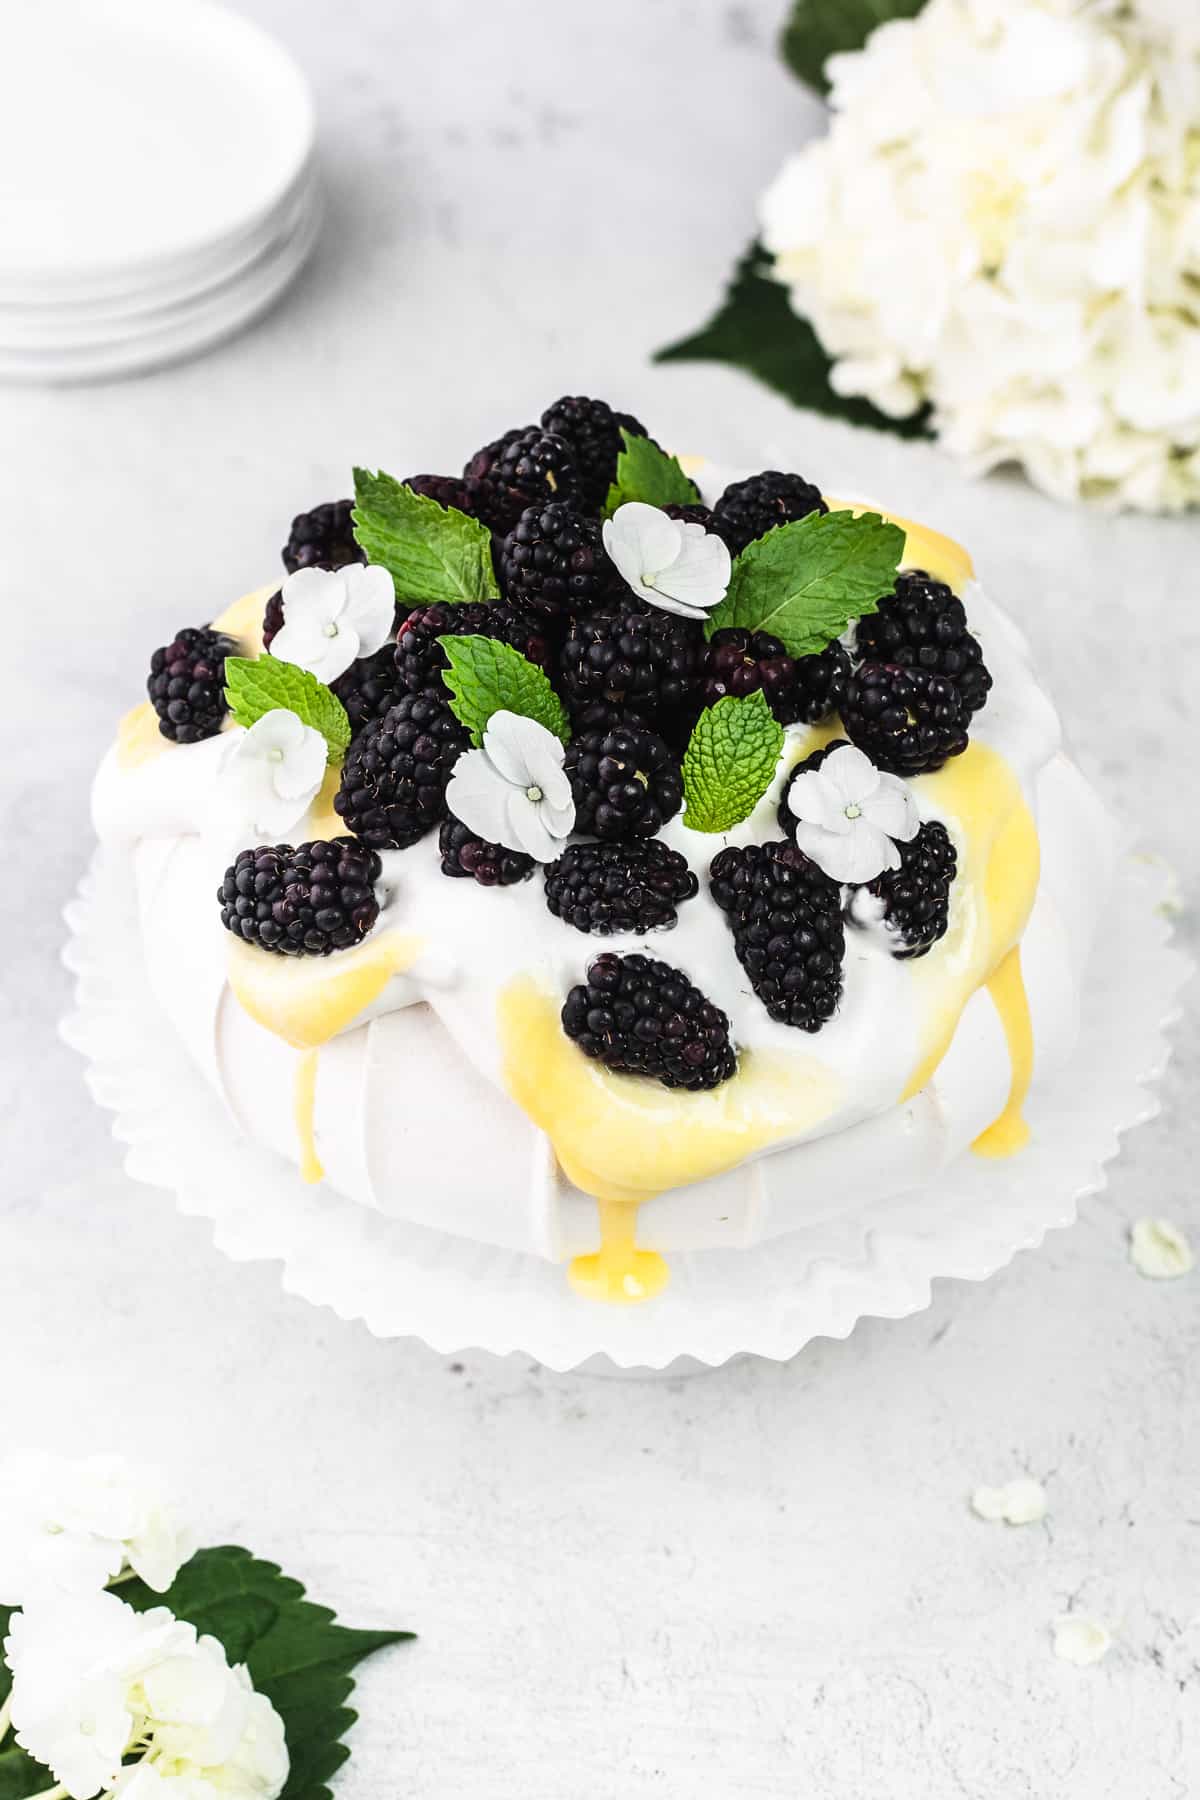
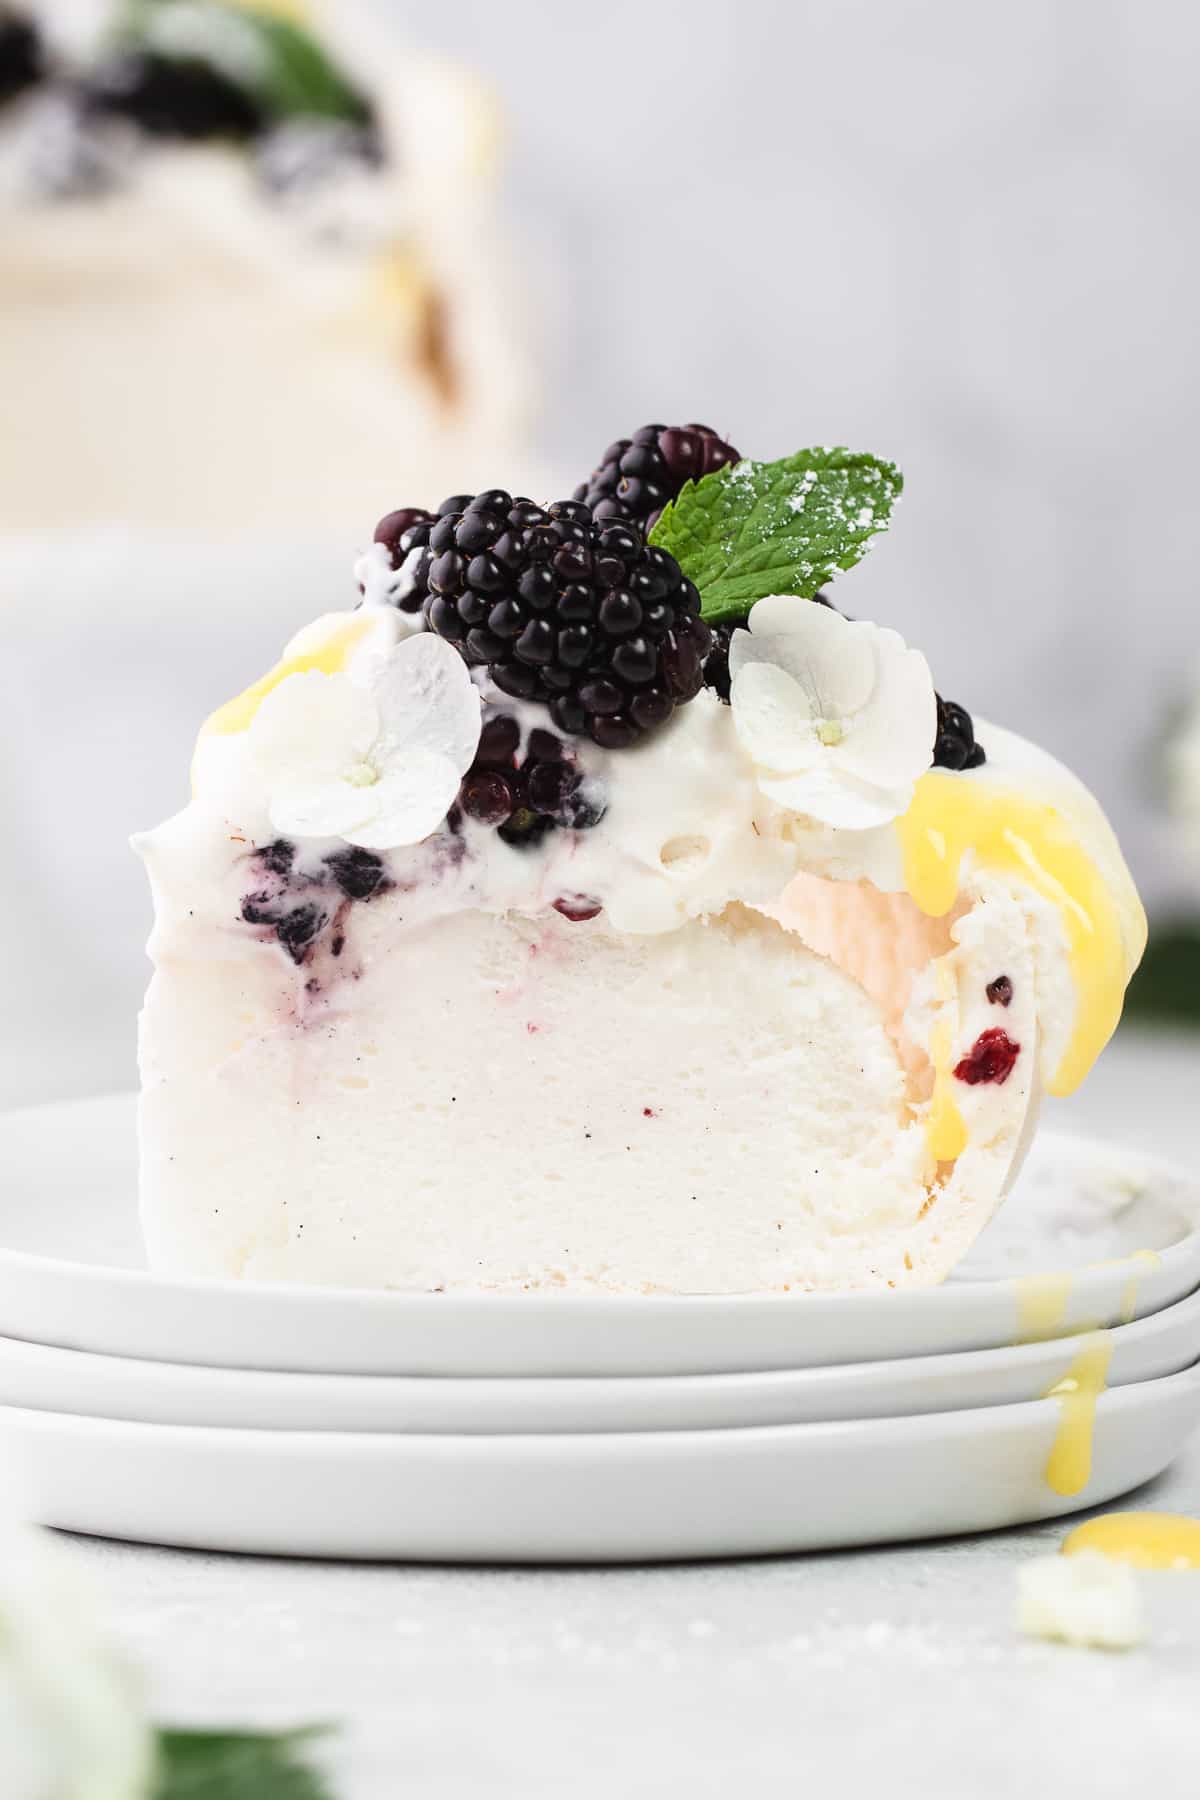
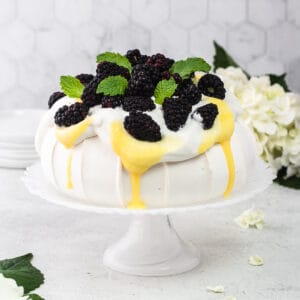
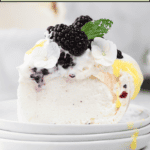
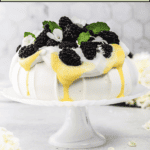
The most delightful Lavender Blackberry Pavlova topped with Lavender Whipped Cream, homemade Lemon Curd and fresh Blackberries! A show-stopping dessert perfect for any occasion!
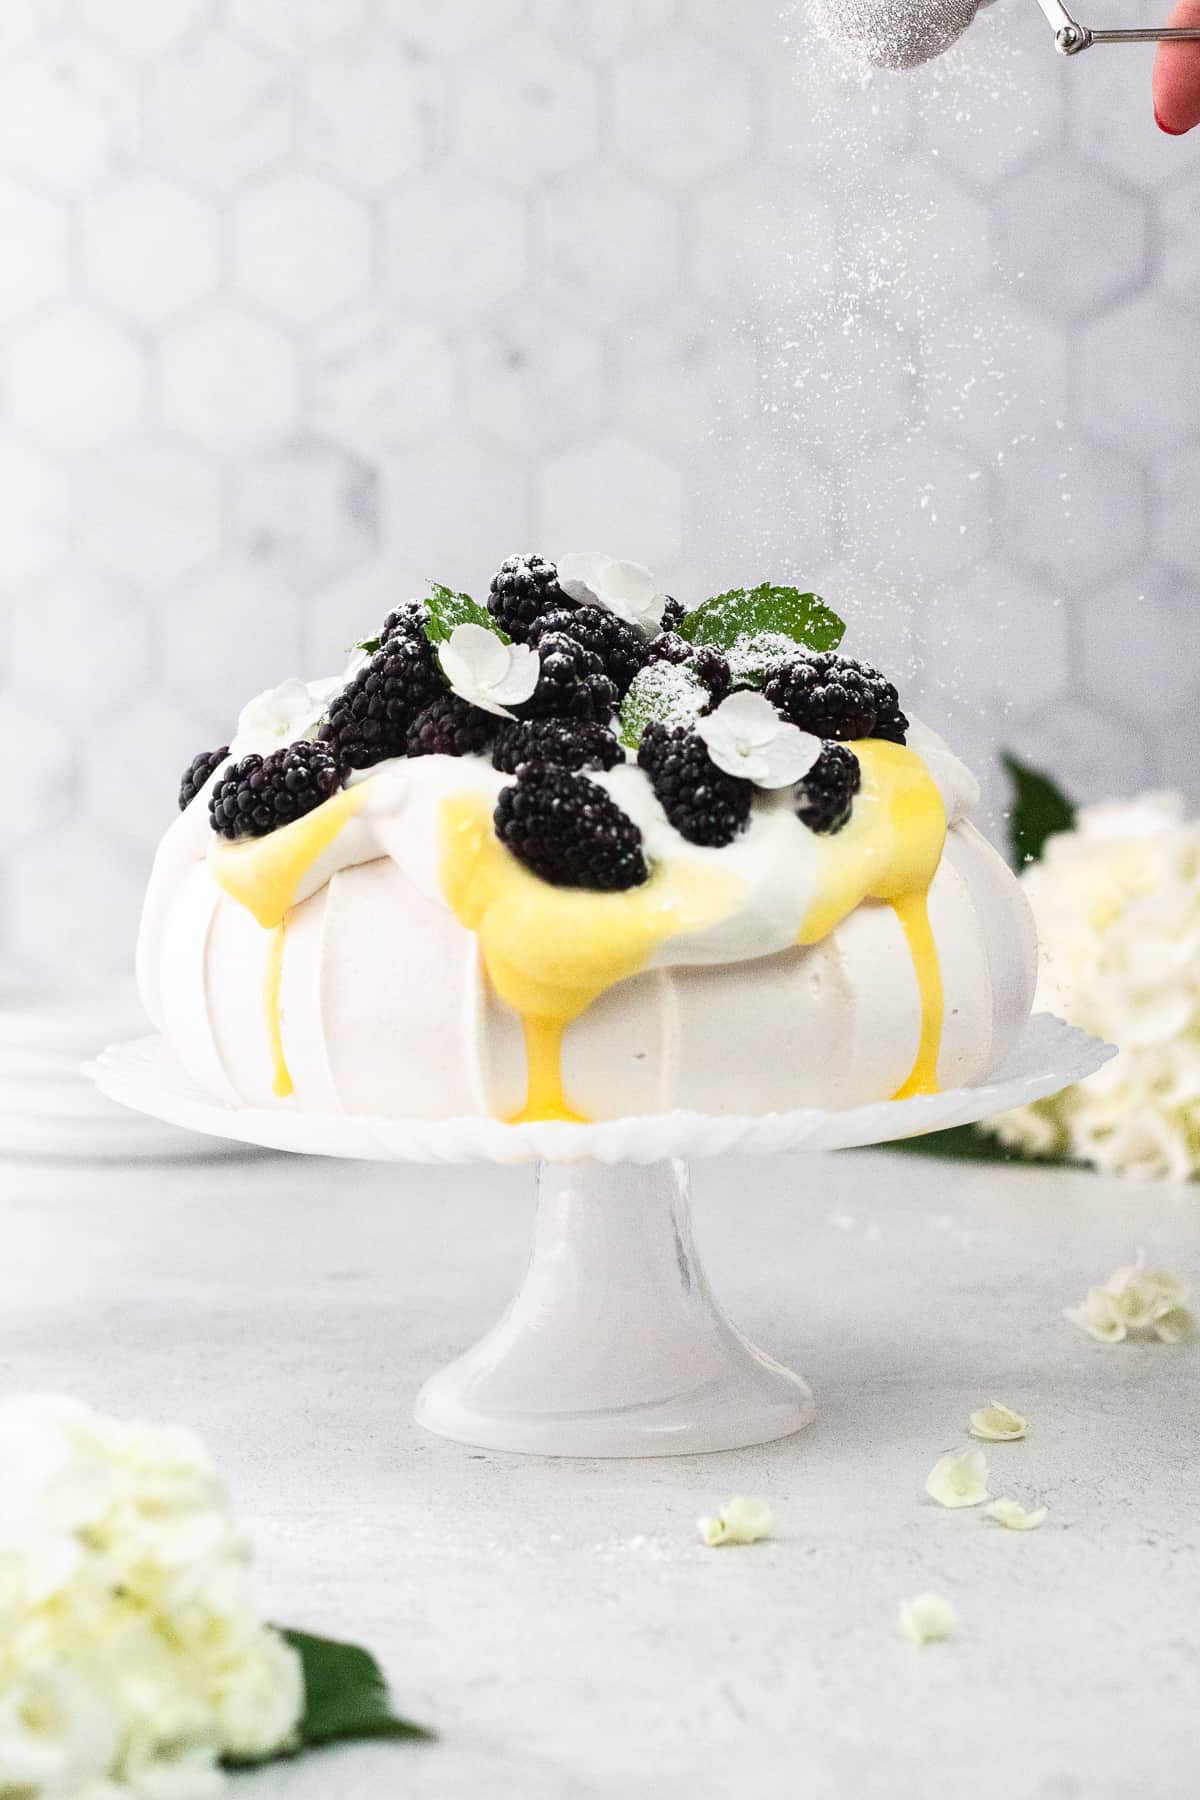
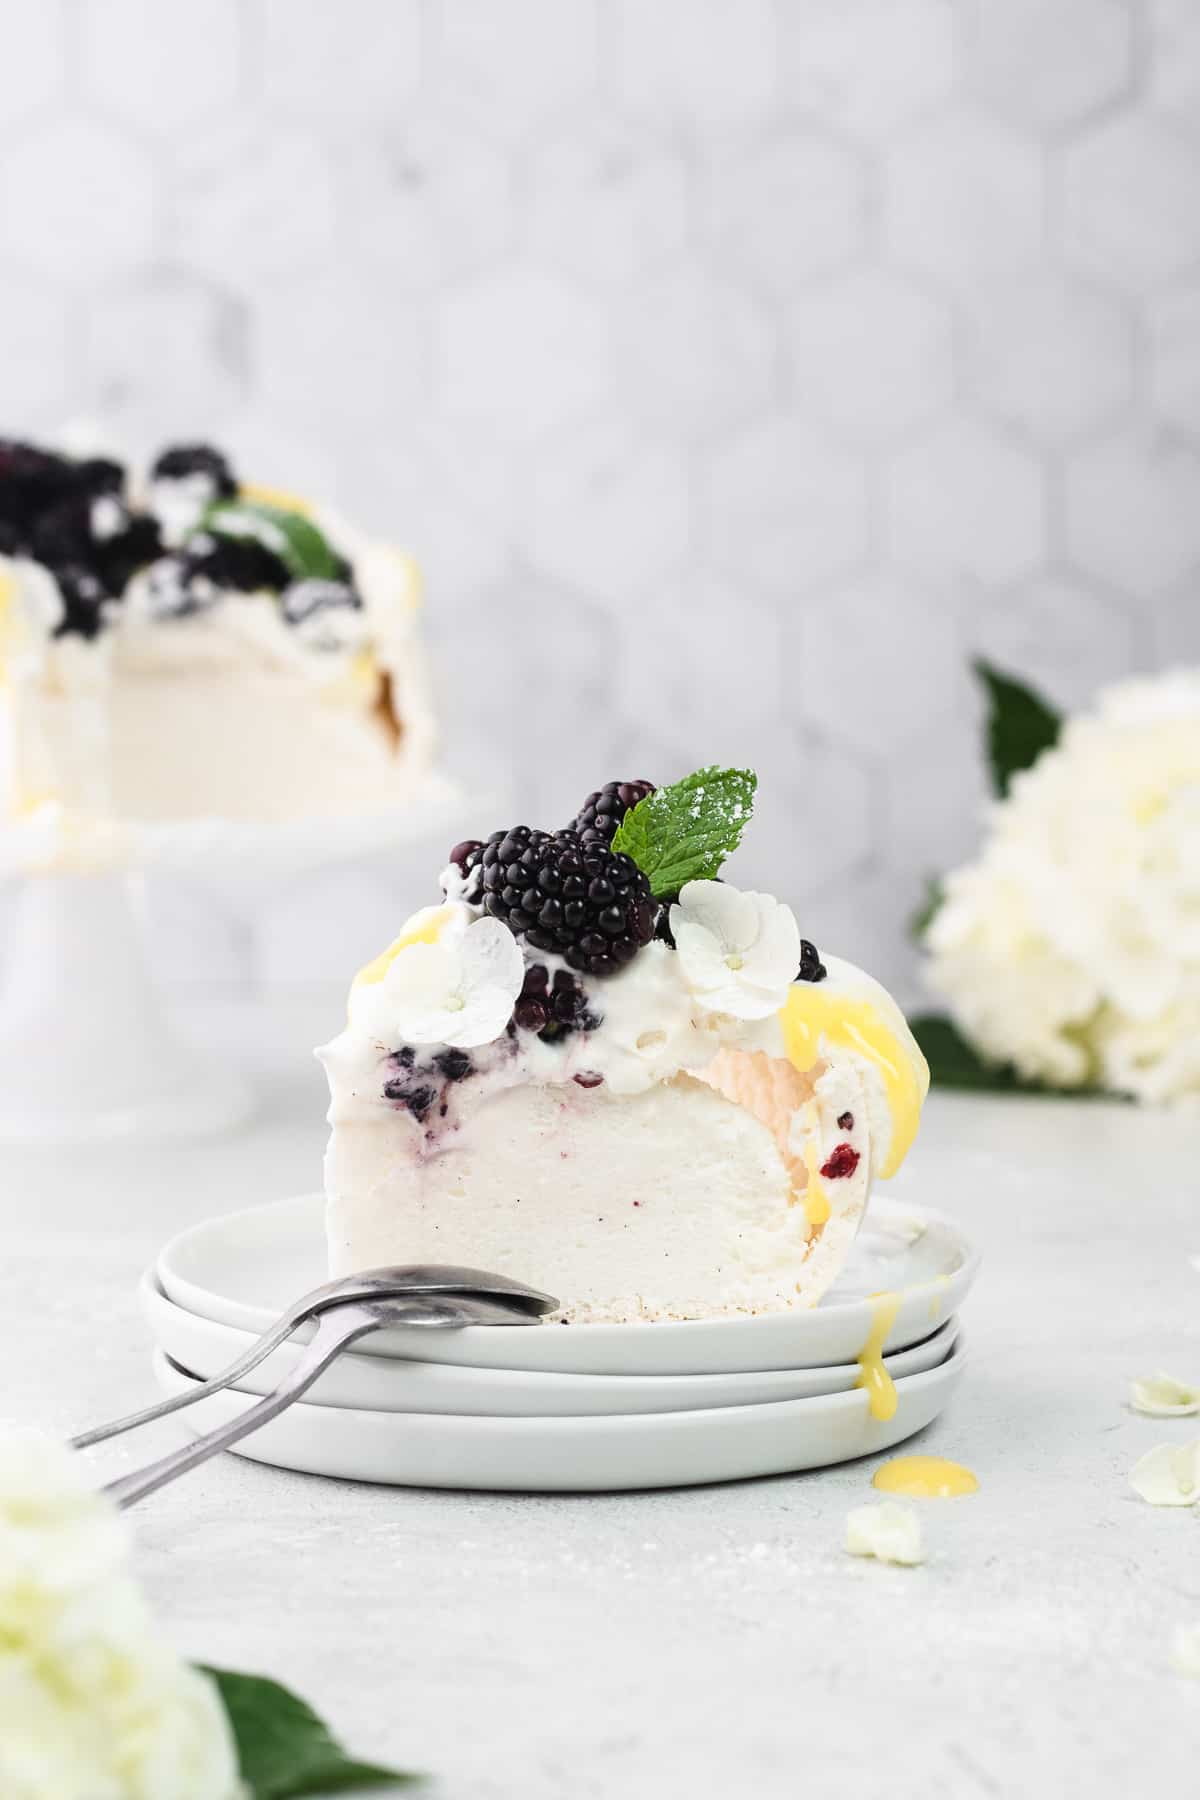
If you have never had Pavlova, you are missing out! It's a meringue-based dessert with a light and crisp exterior shell and a soft and marshmallowy middle. I've paired this Classic Pavlova with beautiful notes of lavender, lemon and blackberries.
Jump to:
Lavender Blackberry Pavlova Ingredients
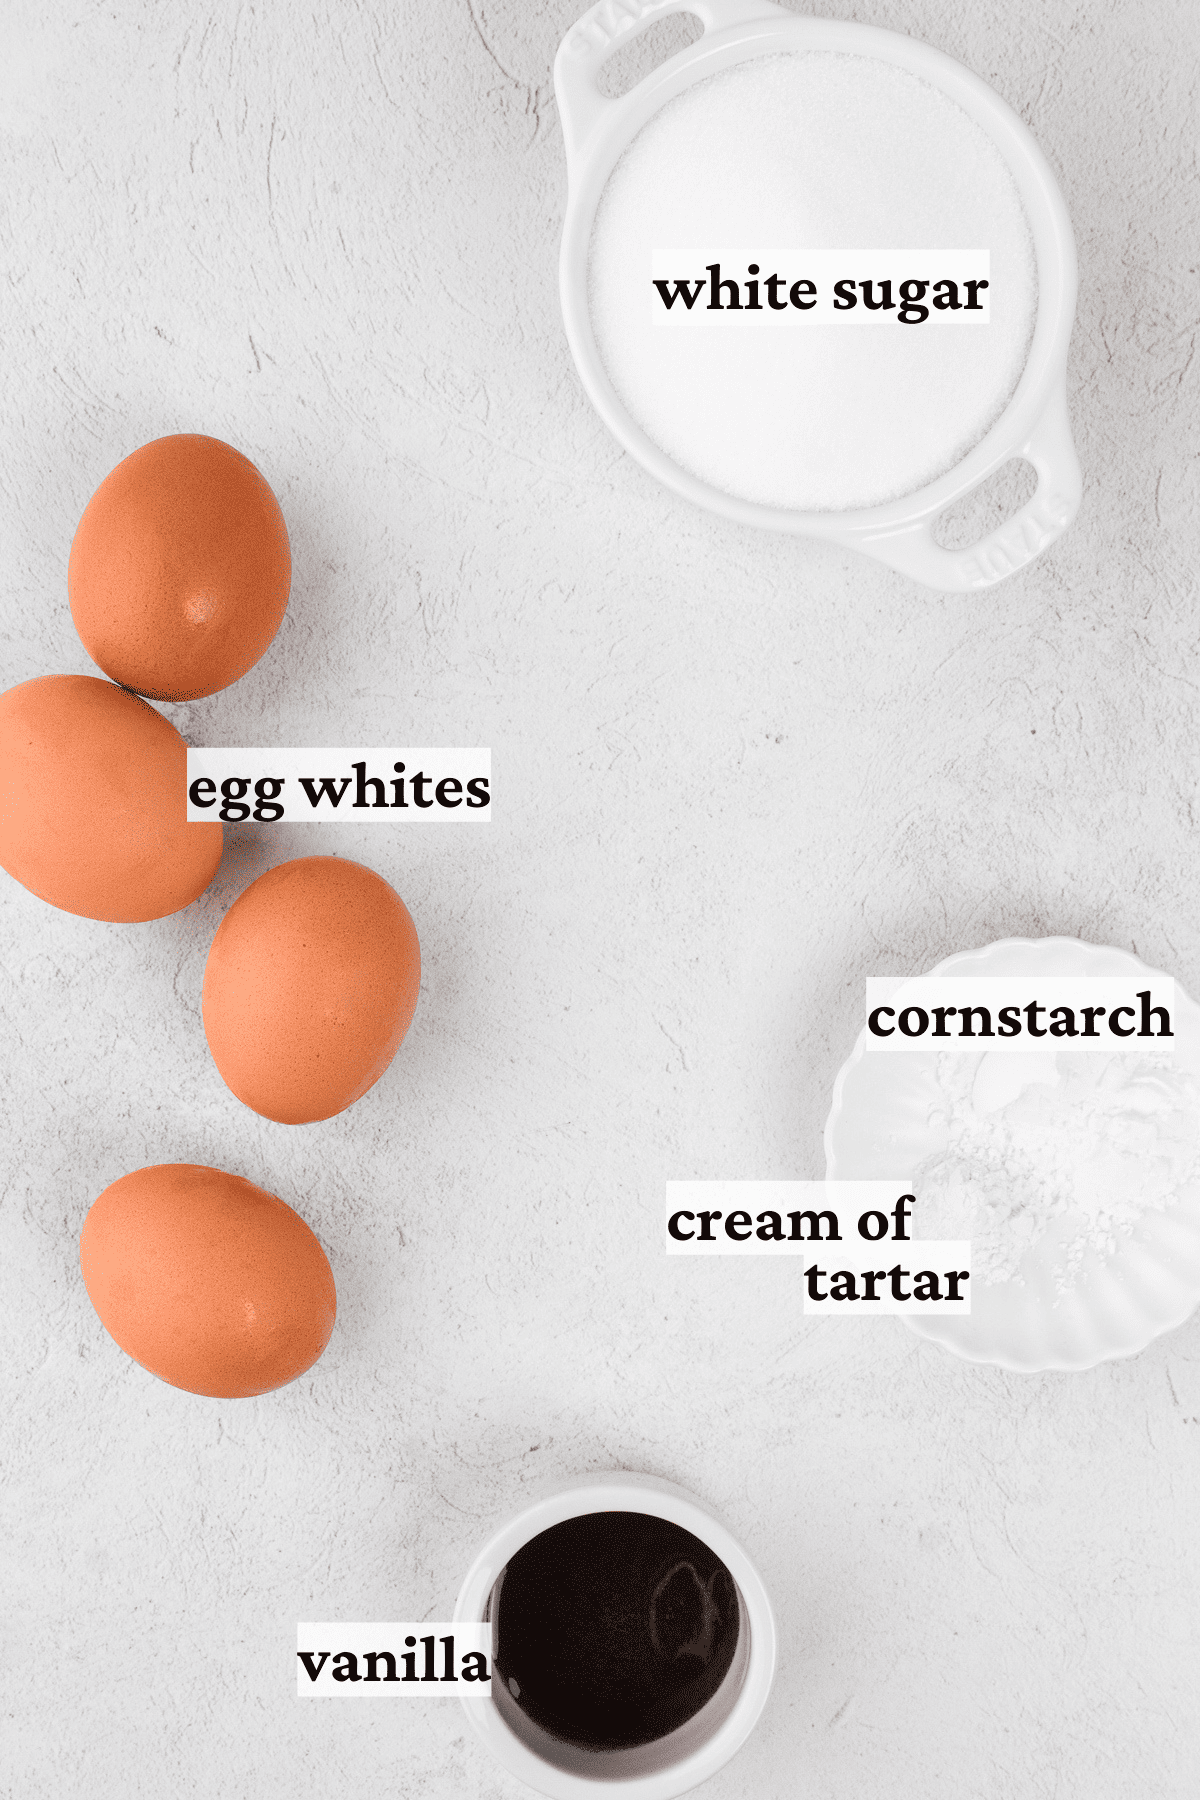
Pavlova
- Eggs Whites. Room temperature egg whites are whipped to stiff peaks.
- Sugar. You'll want to use sugar with fine granules, such as superfine baker's sugar or caster sugar (UK). If you do not have those on hand, don't fret. I blended regular granulated white sugar in the food processor for about 3 minutes.
- Cornstarch. Creates a chewy texture with a marshmallow center.
- Cream of Tartar. It's important to add an acid to stabilize and prevents the pavlova from collapsing. If you don't have cream of tartar, you can substitute with white vinegar or lemon juice.
- Vanilla. I prefer using vanilla paste as it adds more flavor, but you can use vanilla extract too.
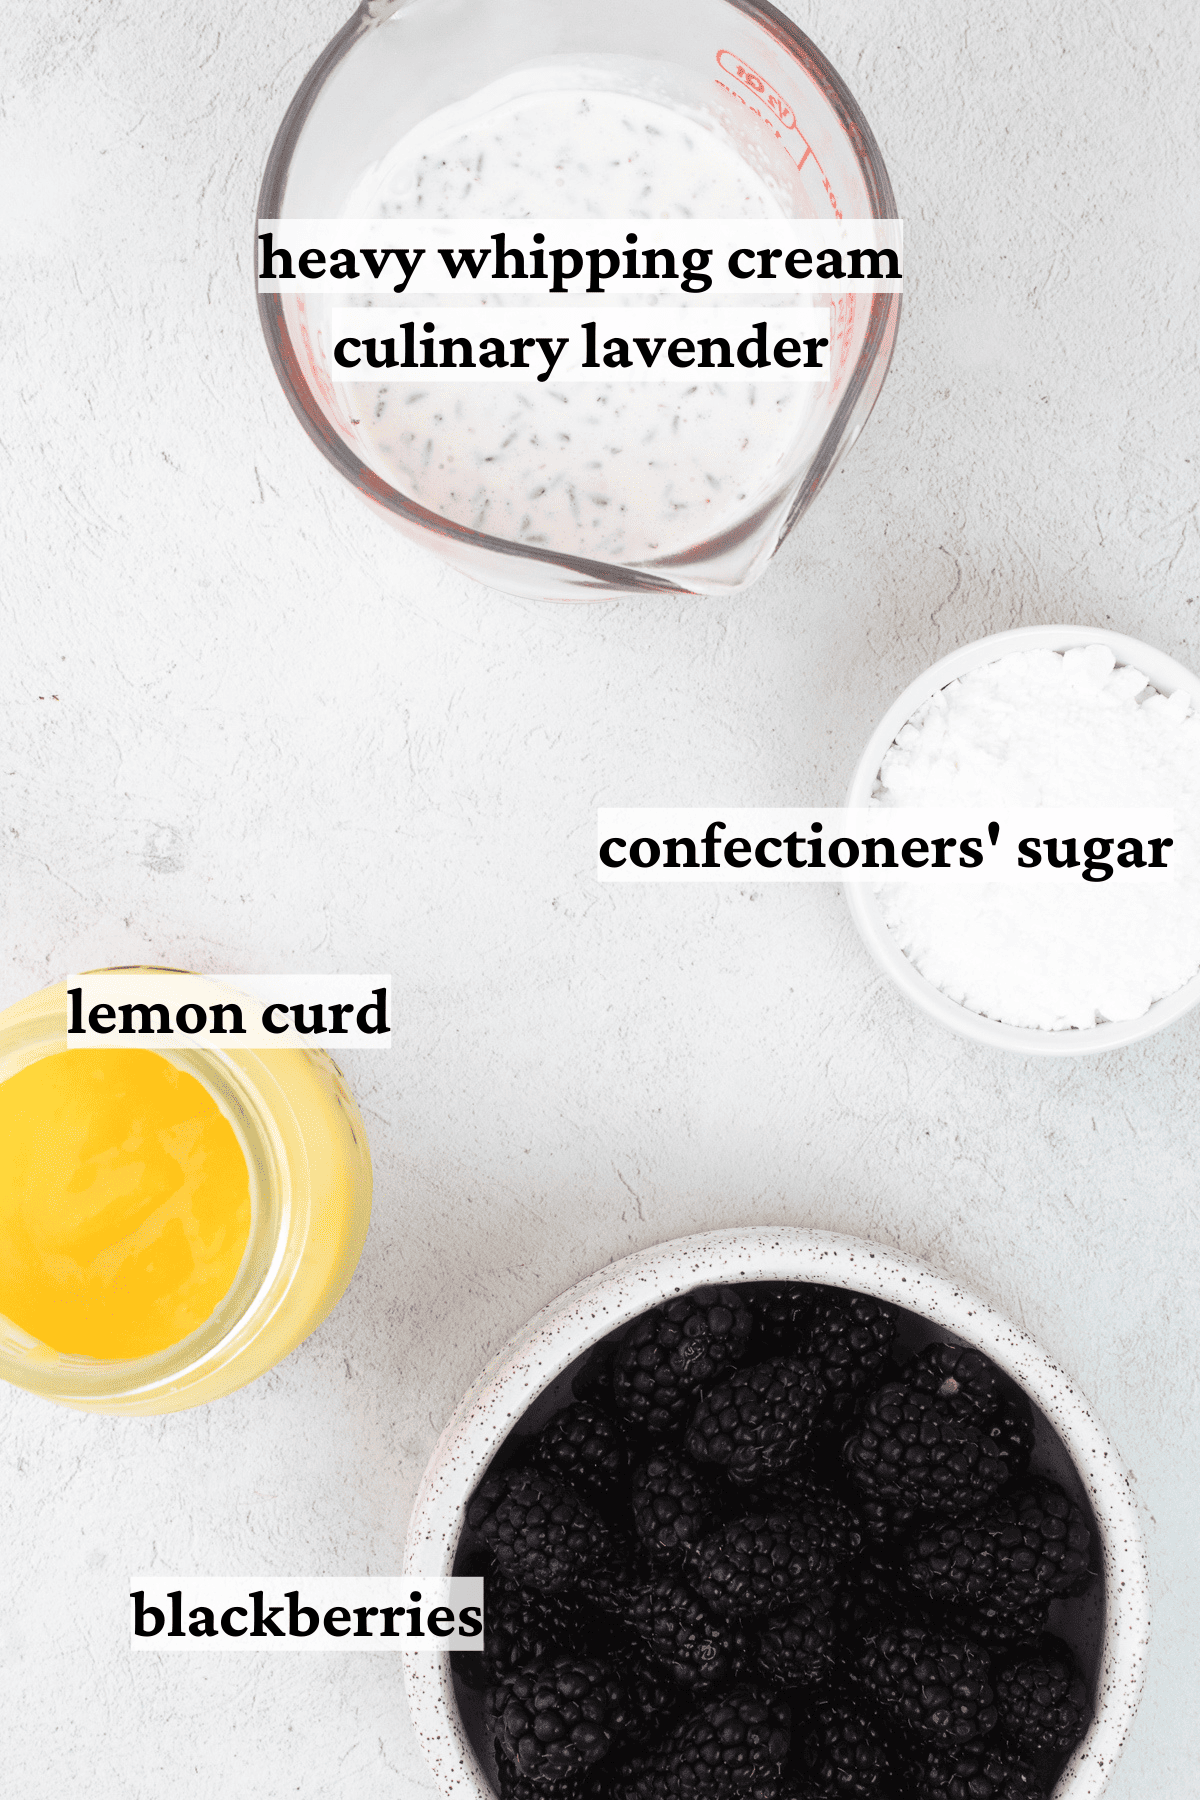
Lavender Whipped Cream
- Heavy Whipping Cream. Cold whipping cream is whipped to medium peaks.
- Culinary Lavender. Make sure to get culinary grade Lavender. I got mine on Amazon. This is not an affiliate link.
- Confectioners' Sugar. We'll just be adding a little bit of confectioners' sugar to add a touch of sweetness.
Additional Garnish
- Lemon Curd. Although you can use store-bought lemon curd, I highly recommend making your own because it's so easy and tastes so much better.
- Fresh Blackberries. The combination of blackberries, lemon curd and lavender is magnificent!
- Confectioners' Sugar. This is optional as the pavlova is sweet enough, but if you'd like to add some drama to the table then add confectioners' sugar!
*See recipe card for quantities.
Lavender Blackberry Pavlova Instructions
On Day 1...
Step 1. Make your homemade Lemon Curd - Recipe can be found here! You can make curd ahead and store it in the fridge for up to 10 days.
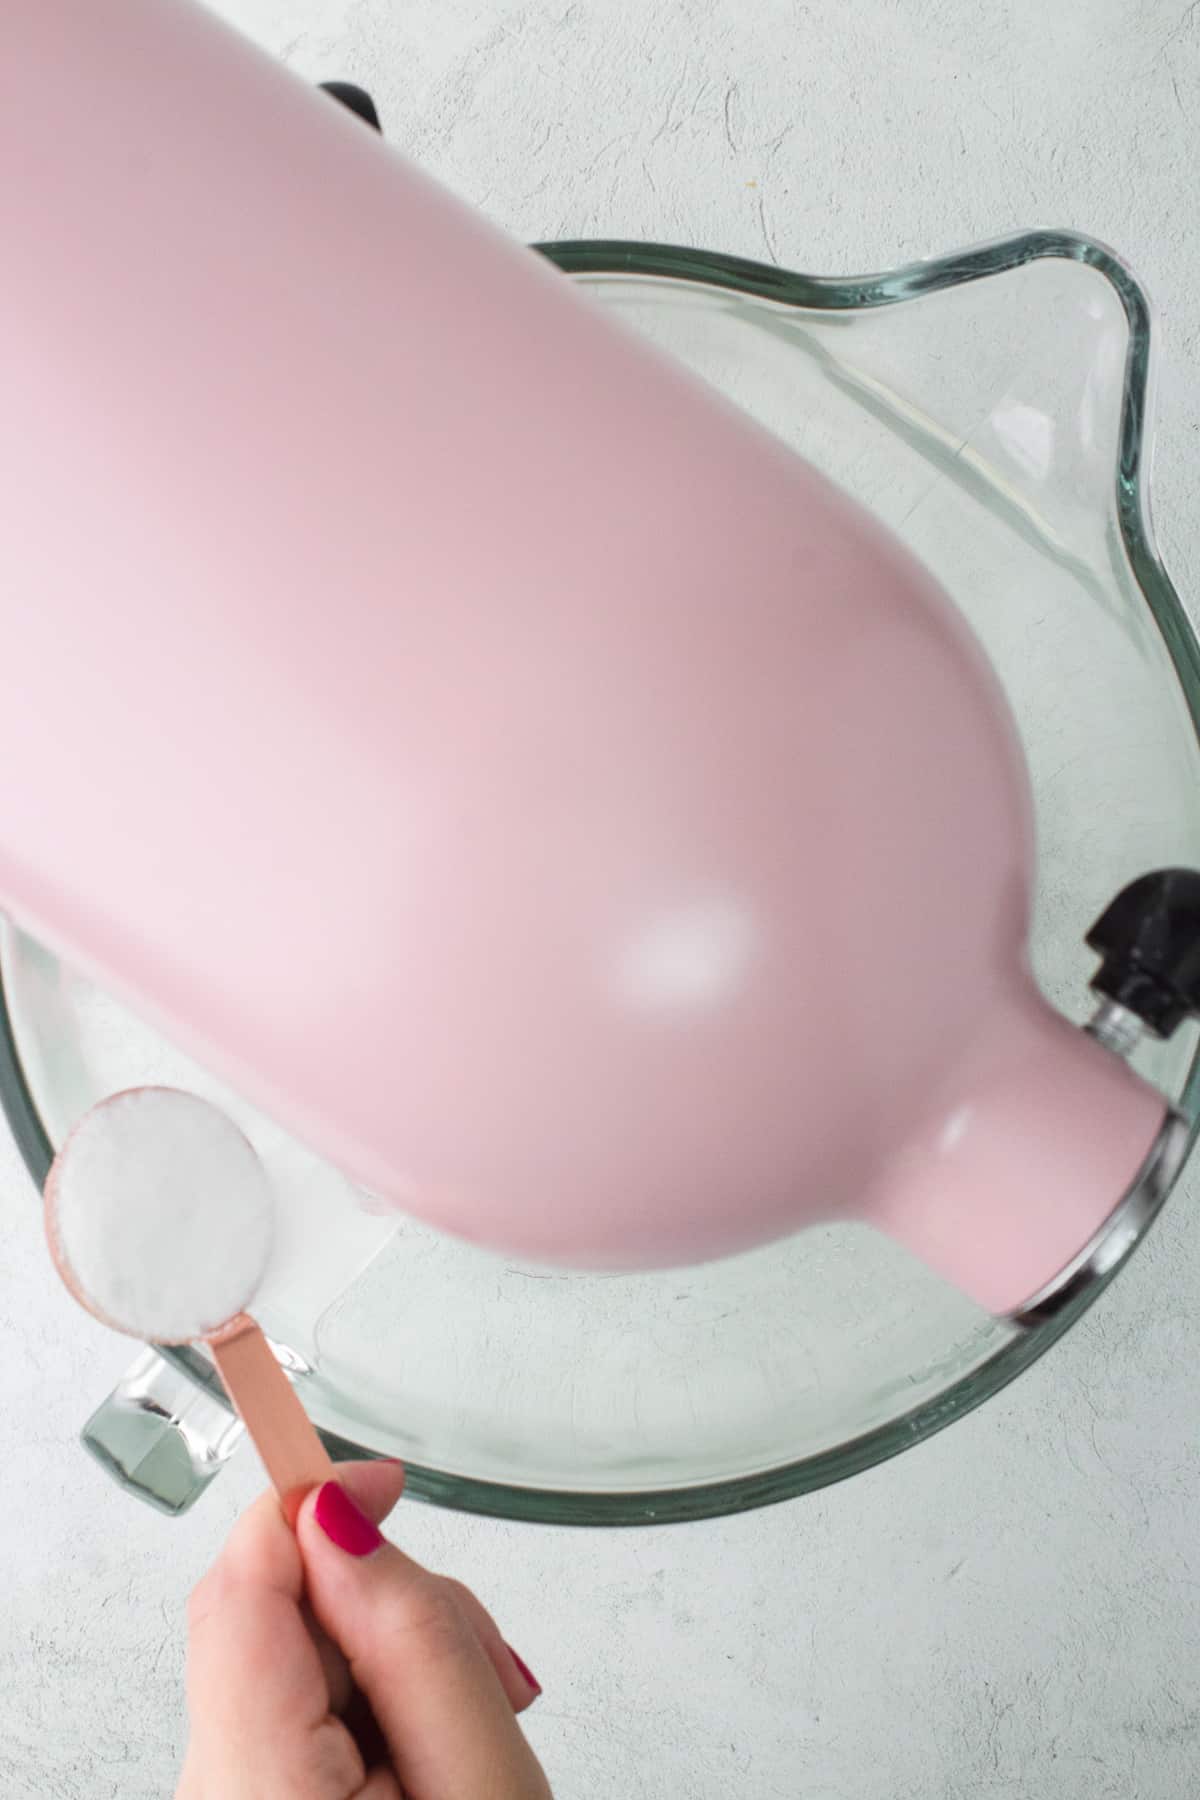
Step 2. Prep your Lavender Whipped Cream - In a measuring cup or small bowl, combine 1 cup of heavy whipping cream with 2 to 3 teaspoons of culinary lavender. I used 3 teaspoons and found the lavender flavor to be perfect. Cover with cling wrap and chill overnight (about 8 hours) until you are ready to serve your pavlova.
Step 3. Make your Pavlova - Set a rack in the center of the oven and preheat to 225ºF (107ºC). Using a cake pan or plate, draw a 6-inch (15 cm) circle on parchment paper and then flip the paper over and set it on a large baking sheet. Set aside.
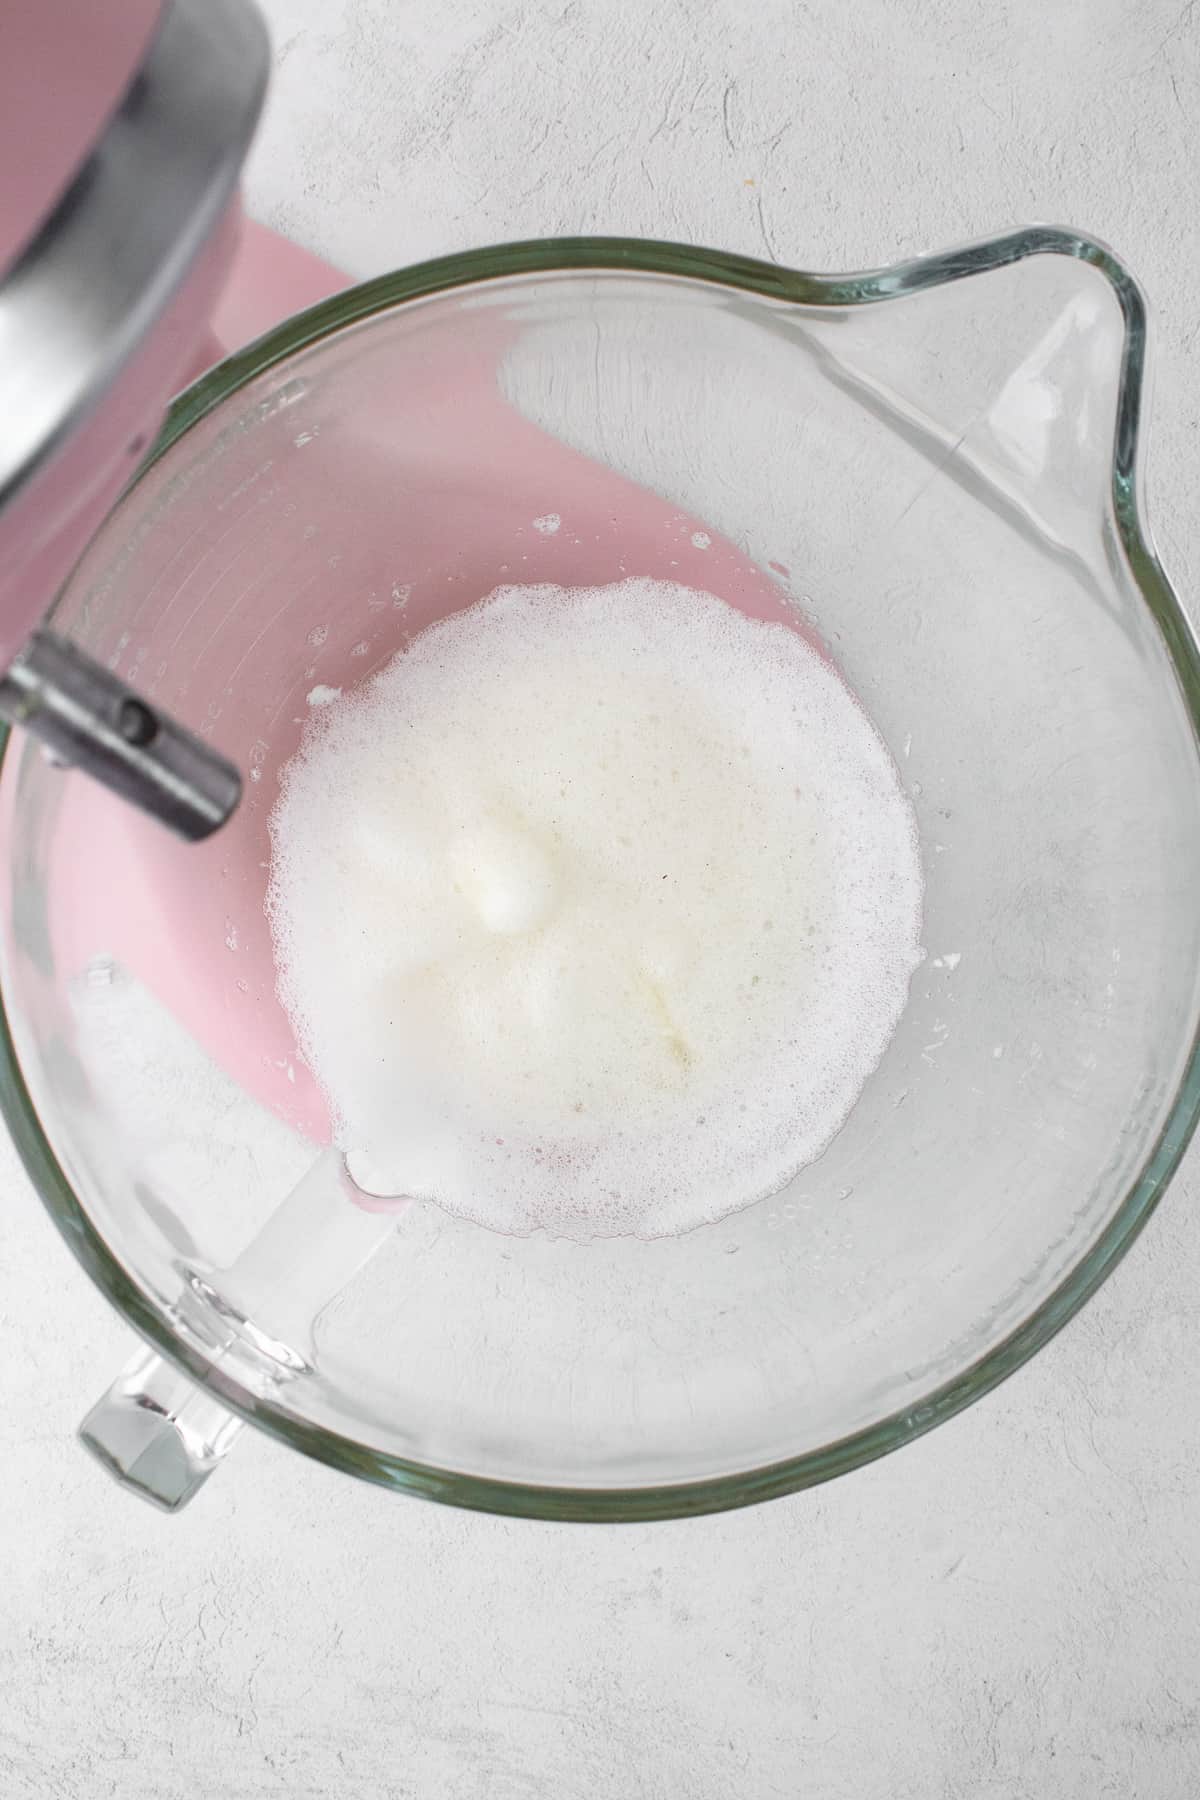
Step 4. Using a hand or stand-mixer fitted with a whisk attachment, beat egg whites on medium speed until frothy. About 3 minutes.
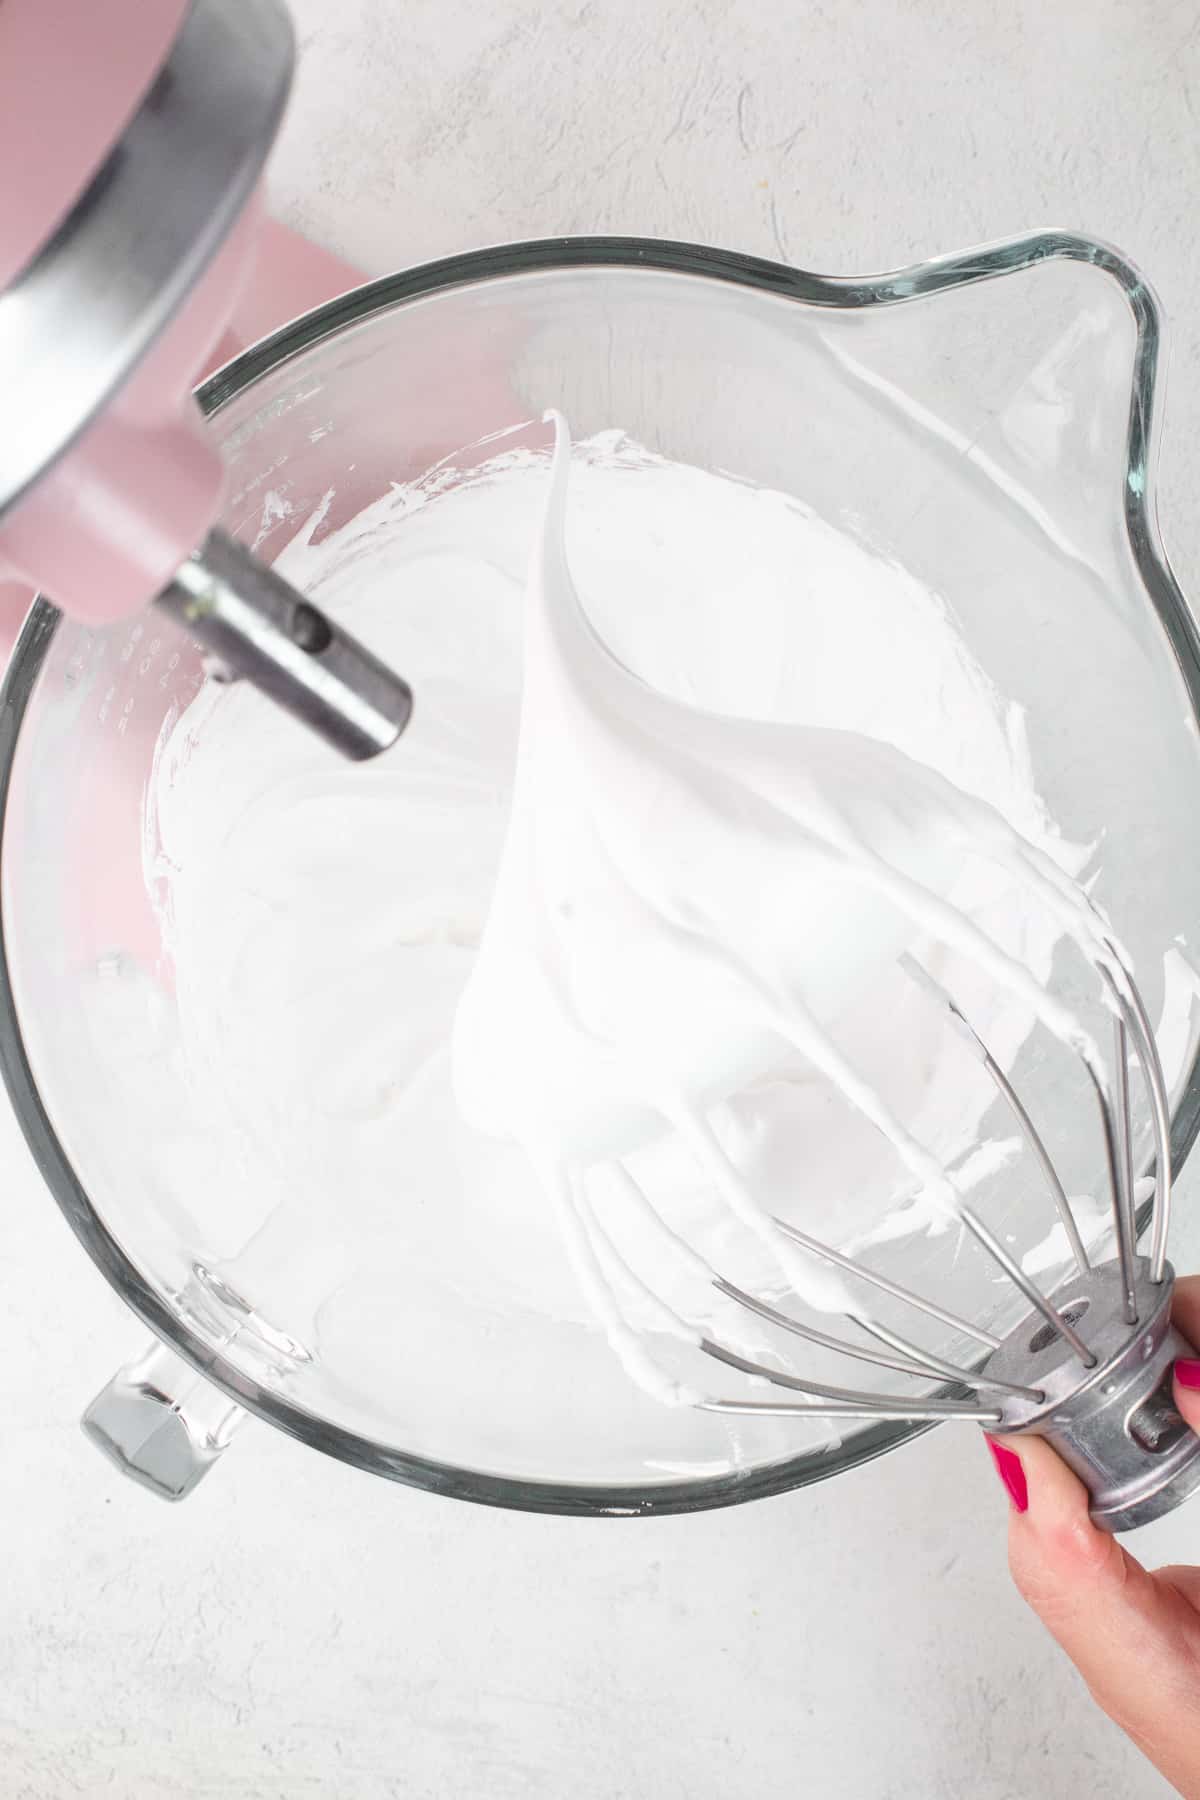
Step 5. With the mixer still running on medium speed, add fine sugar, 1 tablespoon at a time. Allow the sugar to fully incorporate before adding the next tablespoon, about 30 seconds in between. Beat until the mixture is shiny with stiff peaks. Should take about 16 to 20 minutes depending on the speed of your mixer.
Step 6. Turn mixer off, sift in cornstarch, cream of tartar (or 1 teaspoon of white vinegar if using) and vanilla. Increase speed to medium high speed and continue beating for an additional 1 minute. Mixture should be firm and hold its peak without falling over.
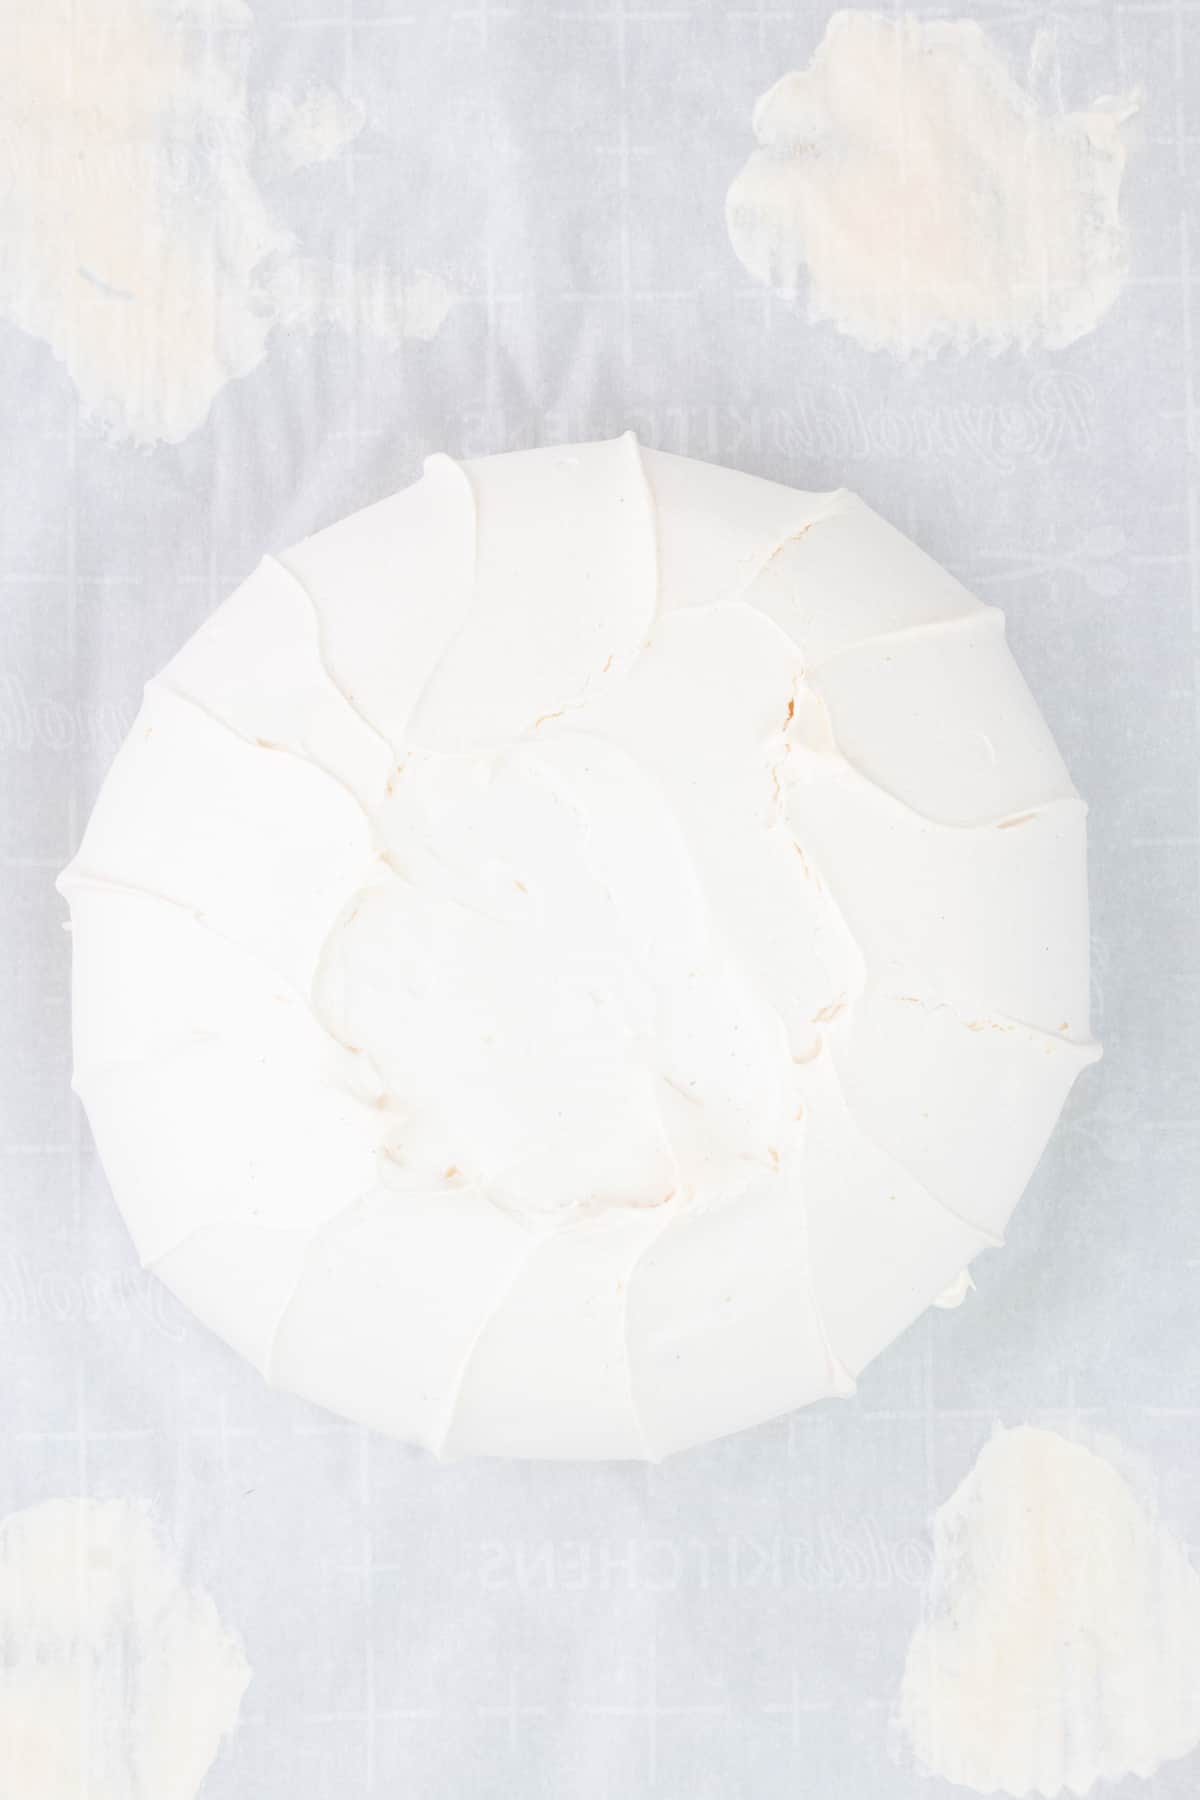
Step 7. Add 4 small dollops of meringue directly onto the baking sheet in each corner and then place the parchment paper on top, to help it stick to the baking sheet. Transfer the meringue onto your baking sheet, making sure to stay within the circle. You can either keep it rustic or create a decorative design on the side of your pavlova.
Step 8. Bake for 1 hour and 20 minutes. Turn off the oven and allow the pavlova to cool completely in the oven overnight. Keep the oven door closed until you're ready to serve.
On Day 2...
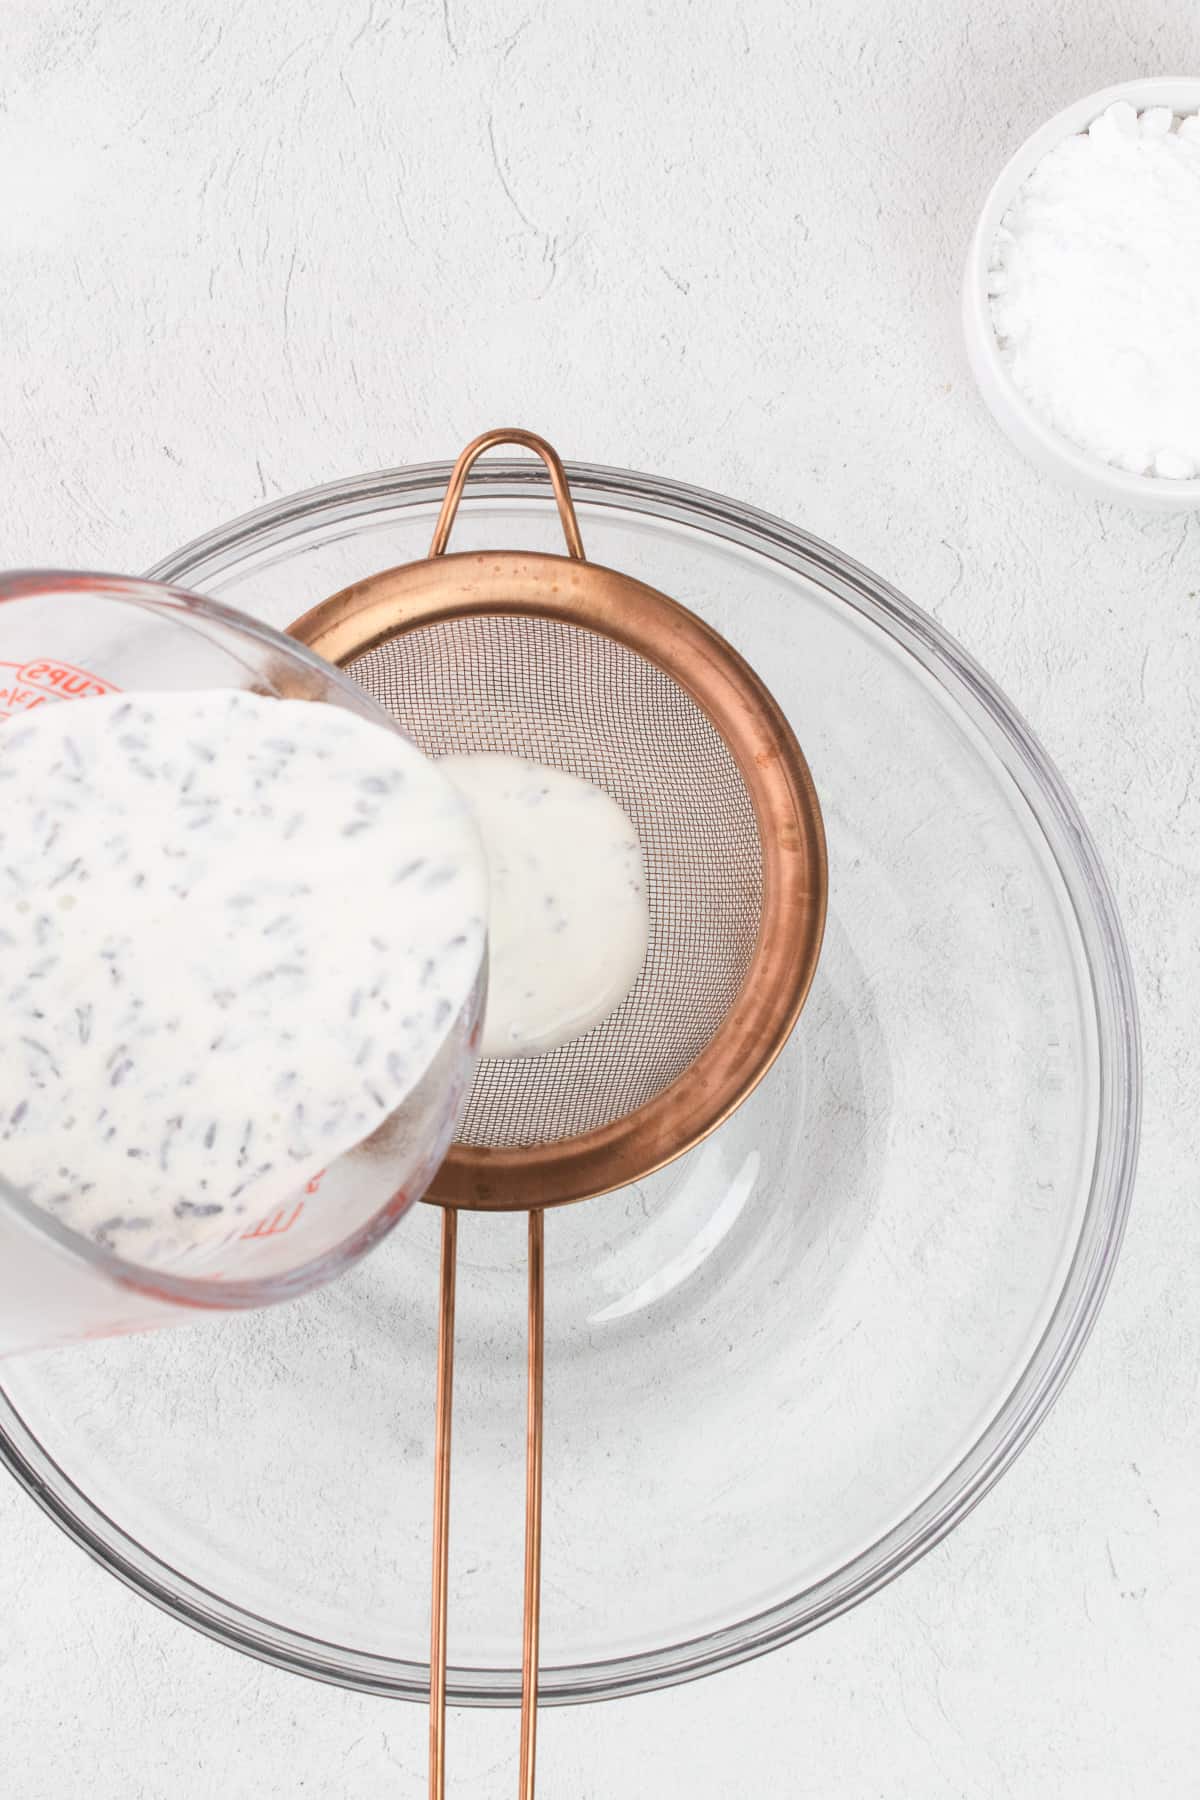
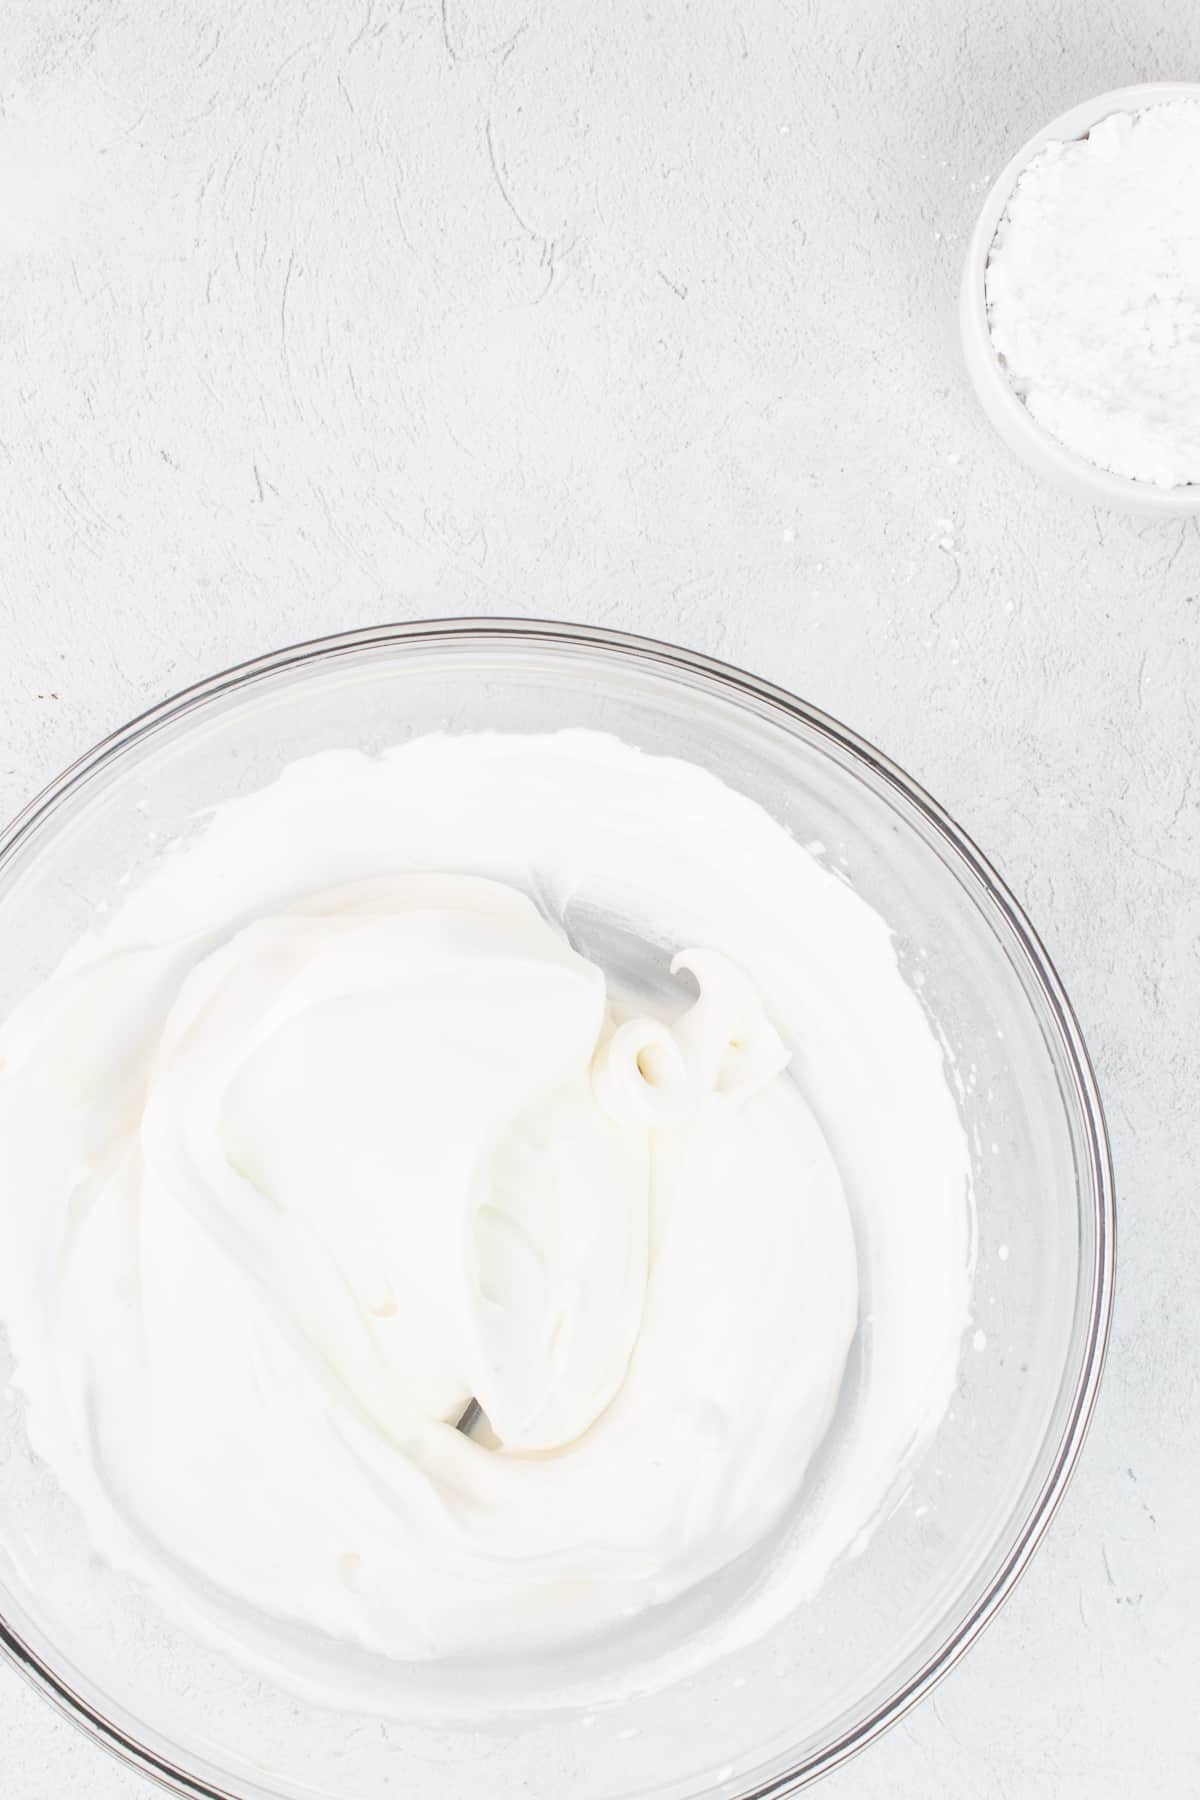
Step 1. Make your Lavender Whipped Cream - Strain your cream into a medium sized bowl and discard the lavender. With a hand-held mixer, whisk on medium speed just until you reach soft to medium peaks. Sift in your confectioners' sugar and whisk until you reach the desired consistency. I kept mine of the softer side. Place in the fridge until needed.
Step 2. Assemble your Pavlova - When you are ready to serve, spread the whipped cream on top of the Pavlova, followed by your lemon curd and then your fresh blackberries. Serve immediately and enjoy!!
💡 Tip
It's important to assemble the pavlova right before serving because the moment you add your whipped cream and berries, it will begin to soften and collapse. Don't fret, this is normal! Just add extra berries on top!
Expert Tips
Use fresh eggs. Fresh eggs whip up better and is more stable. Also do not use egg whites from the carton.
Use room temperature egg whites. Room temperature egg whites whip up faster than cold egg whites and are more voluminous. Submerge your eggs in a bowl of hot tap water for 20 minutes. Swap out with fresh hot tap water half way through.
Seperate your egg whites by using the hand method. When separating the egg whites from the yolks, pass the egg whites through your hand rather than passing it back and forth with the shells. The shells are sharp and can pierce the yolks and can fall into your mixture. If you get any yolks into the egg whites, you'll need to start over. The fat from the yolk will hinder it from whipping up.
Use fine sugar. You can use caster sugar or superfine baker's sugar. The reason why you'll want to use fine sugar is so that it'll dissolve easily. If you are using sugar with larger granules, you can run it through a food processor for 3 to 4 minutes to break it down.
Slow and steady wins the race. Whip the egg whites on medium speed (never on high speed) and slowly add your sugar. Over whipping the meringue can cause it to crack and eventually collapse due to excessive air.
Make sure the sugar is completely dissolved. You can test this by rubbing a little bit of the merguine in between your fingers. It should feel smooth and not gritty.
Don't open the oven door while it's baking or after it's done. Extreme temperature changes can cause the meringue to crack and even collapse. If your oven temperature is accurate, you won't need to open the oven to check the doneness. The best way to know the true temperature of you oven is to get an oven temperature gauge like this one (not an affiliate link).
Assemble right before serving. It's important to assemble the pavlova right before serving because the moment you add the whipped cream and toppings, it will start to soften and eventually collapse and can become soggy the longer it sits.
Don't make pavlova when it's humid. Pavlova contains a lot of sugar and sugar likes to absorbs moisture from the atmosphere. The excess moisture can cause weeping. Don't even run your dishwasher!
Variations
The best thing about Pavlova is it's versatility. There are so many different combinations of toppings that can be swapped out for.
- For the Berries - Strawberries, Blueberries, Raspberries
- For the Curd - Citrus Blend, Orange, Blood Orange, Lime, Grapefruit
- For the Whipped Cream - Vanilla, Chocolate, Lemon, Cinnamon, Earl Grey
Storage
Pavlova is best eaten the same day. However, you can store leftovers in an airtight container in the fridge for up to 2 days.
FAQ
Pavlova is a meringue based dessert that originated from Australia or New Zealand. It is believed to be named after a Russian Ballerina called Anna Pavlova. The texture is very light and crisp and has a marshmallowy and chewy center. It's generally served with fresh whipped cream and seasonal fruits. It's also naturally gluten-free, which means it's a crowd-pleasing dessert.
Weeping is when liquid seeps out of the meringue. This happens when the sugar isn't completely dissolved. Before baking the meringue, you can easily test by rubbing a bit of meringue in between your fingers to make sure it's smooth. Also, make sure you are using fine sugar and adding it slowly to the egg whites.
If there are any fats or water droplets in the bowl or on the beater, it will prevent the egg whites from whipping. Make sure to wipe the bowl and beaters clean before starting. Also, you'll run into issues even if there is a tiny bit of yolk in the mixture. When separating the egg whites from the yolks, pass the egg whites through your hand rather than passing it back and forth with the shells. The shells are sharp and can pierce the yolk. Trust me, this has happened to me and it's very frustrating.
Baking at too high of a temperature, opening the oven door too often white it's baking and cooling, and over whipping the meringue can all cause cracking.
Whipping air into the egg whites is what gives the pavlova structure and stability. Make sure you're whipping them to stiff peaks. Also, when shaping your pavlova, pile it high.
If your pavlova is very brown, then the oven temperature if too high. Unfortunately, every oven runs differently. The best way to know the true temperature of your oven is to use an oven temperature gauge like this one. I've tested this recipe in various temperatures and found that 225ºF (107ºC) was perfect.
Your pavlova shell should feel crisp and dry and lift off the parchment paper without difficulty. The color should also be white with no brown spots. The pavlova shell should also be smooth and not grainy in appearance.
I like to bake the meringue the night before and let it cool in the oven overnight with the door closed and then serve the next day. If you're not serving it the next day, store the cooled meringue in an airtight container in a cool and dry place (don't store it in the fridge). Keep in mind, it will lose it's crispness the longer it sits. So try to serve it within 2 days.
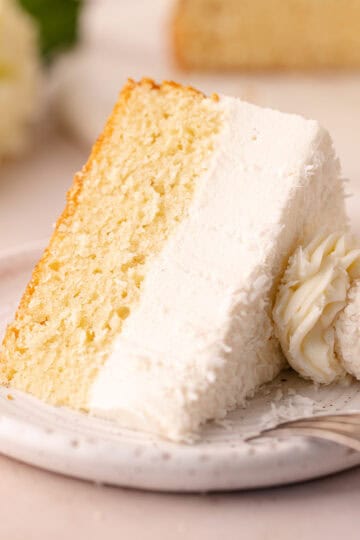
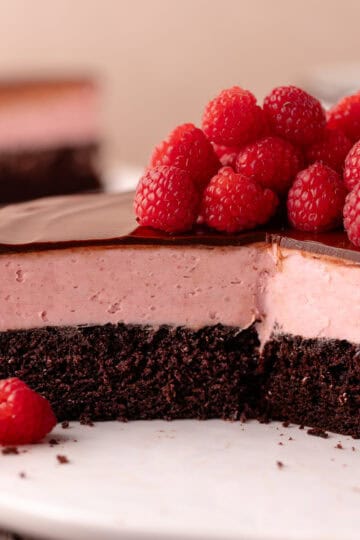
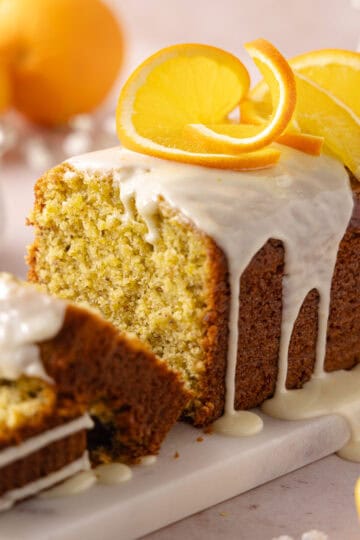
You May Also Enjoy...

♡ Did you try this recipe?
Please consider leaving a 5-star rating and review below. This provides helpful feedback to myself and other readers. Thank you so much!
📖 Recipe
Lavender Blackberry Pavlova
INGREDIENTS
Pavlova
- 4 Large Egg Whites room temp
- 1 Cup 200g Fine White Sugar
- 2 teaspoon Cornstarch or Cornflour sifted
- ½ teaspoon Cream of Tartar
- ½ teaspoon Vanilla Paste or Extract
Lavender Whipped Cream
- 1 Cup 227g Heavy Whipping Cream, cold
- 2 to 3 teaspoon Dried Culinary Lavender
- 2 to 3 tablespoon Confectioners' Sugar sifted
Lemon Curd
Additional Garnish
- Fresh Blackberries
- Confectioners' Sugar optional
Instructions
On Day 1...
- Make your homemade Lemon Curd - Recipe link above. You can make curd ahead and store it in the fridge for up to 10 days.
- Prep your Lavender Whipped Cream - In a measuring cup or small bowl, combine 1 cup of heavy whipping cream with 2 to 3 teaspoons of culinary lavender. I used 3 teaspoons and found the lavender flavor to be perfect. Cover with cling wrap and chill overnight (about 8 hours) until you are ready to serve your pavlova.1 Cup 227g Heavy Whipping Cream, cold2 to 3 teaspoon Dried Culinary Lavender
- Make your Pavlova - Set a rack in the center of the oven and preheat to 225ºF (107ºC). Using a cake pan or plate, draw a 6-inch (15 cm) circle on parchment paper and then flip the paper over and set it on a large baking sheet. Set aside.
- Using a hand or stand-mixer fitted with a whisk attachment, beat egg whites on medium speed until frothy. About 3 minutes.4 Large Egg Whites
- With the mixer still running on medium speed, add fine sugar, 1 tablespoon at a time. Allow the sugar to fully incorporate before adding the next tablespoon, about 30 seconds in between. Beat until the mixture is shiny with stiff peaks. Should take about 15 to 18 minutes depending on the speed of your mixer.1 Cup 200g Fine White Sugar
- Turn mixer off, sift in cornstarch, cream of tartar (or 1 teaspoon of white vinegar if using) and vanilla. Increase speed to medium high speed and continue beating for an additional 1 minute. Mixture should be firm and hold its peak without falling over.2 teaspoon Cornstarch or Cornflour½ teaspoon Cream of Tartar½ teaspoon Vanilla Paste or Extract
- Add 4 small dollops of meringue directly onto the baking sheet in each corner and then place the parchment paper on top, to help it stick to the baking sheet. Transfer the meringue onto your baking sheet, making sure to stay within the circle. You can either keep it rustic or create a decorative design on the side of your pavlova.
- Bake for 1 hour and 20 minutes. Turn off the oven and allow the pavlova to cool completely in the oven overnight. Keep the oven door closed until you're ready to serve.
On Day 2...
- Make your Lavender Whipped Cream - Strain your cream into a medium sized bowl and discard the lavender. With a hand-held mixer, whisk on medium speed just until you reach soft to medium peaks. Sift in your confectioners' sugar and whisk until you reach the desired consistency. I kept mine of the softer side. Place in the fridge until needed.2 to 3 tablespoon Confectioners' Sugar
- Assemble your Pavlova - When you are ready to serve, spread the whipped cream on top of the Pavlova, followed by your lemon curd and then your fresh blackberries. Serve immediately and enjoy!!
Leave a Rating and Comment