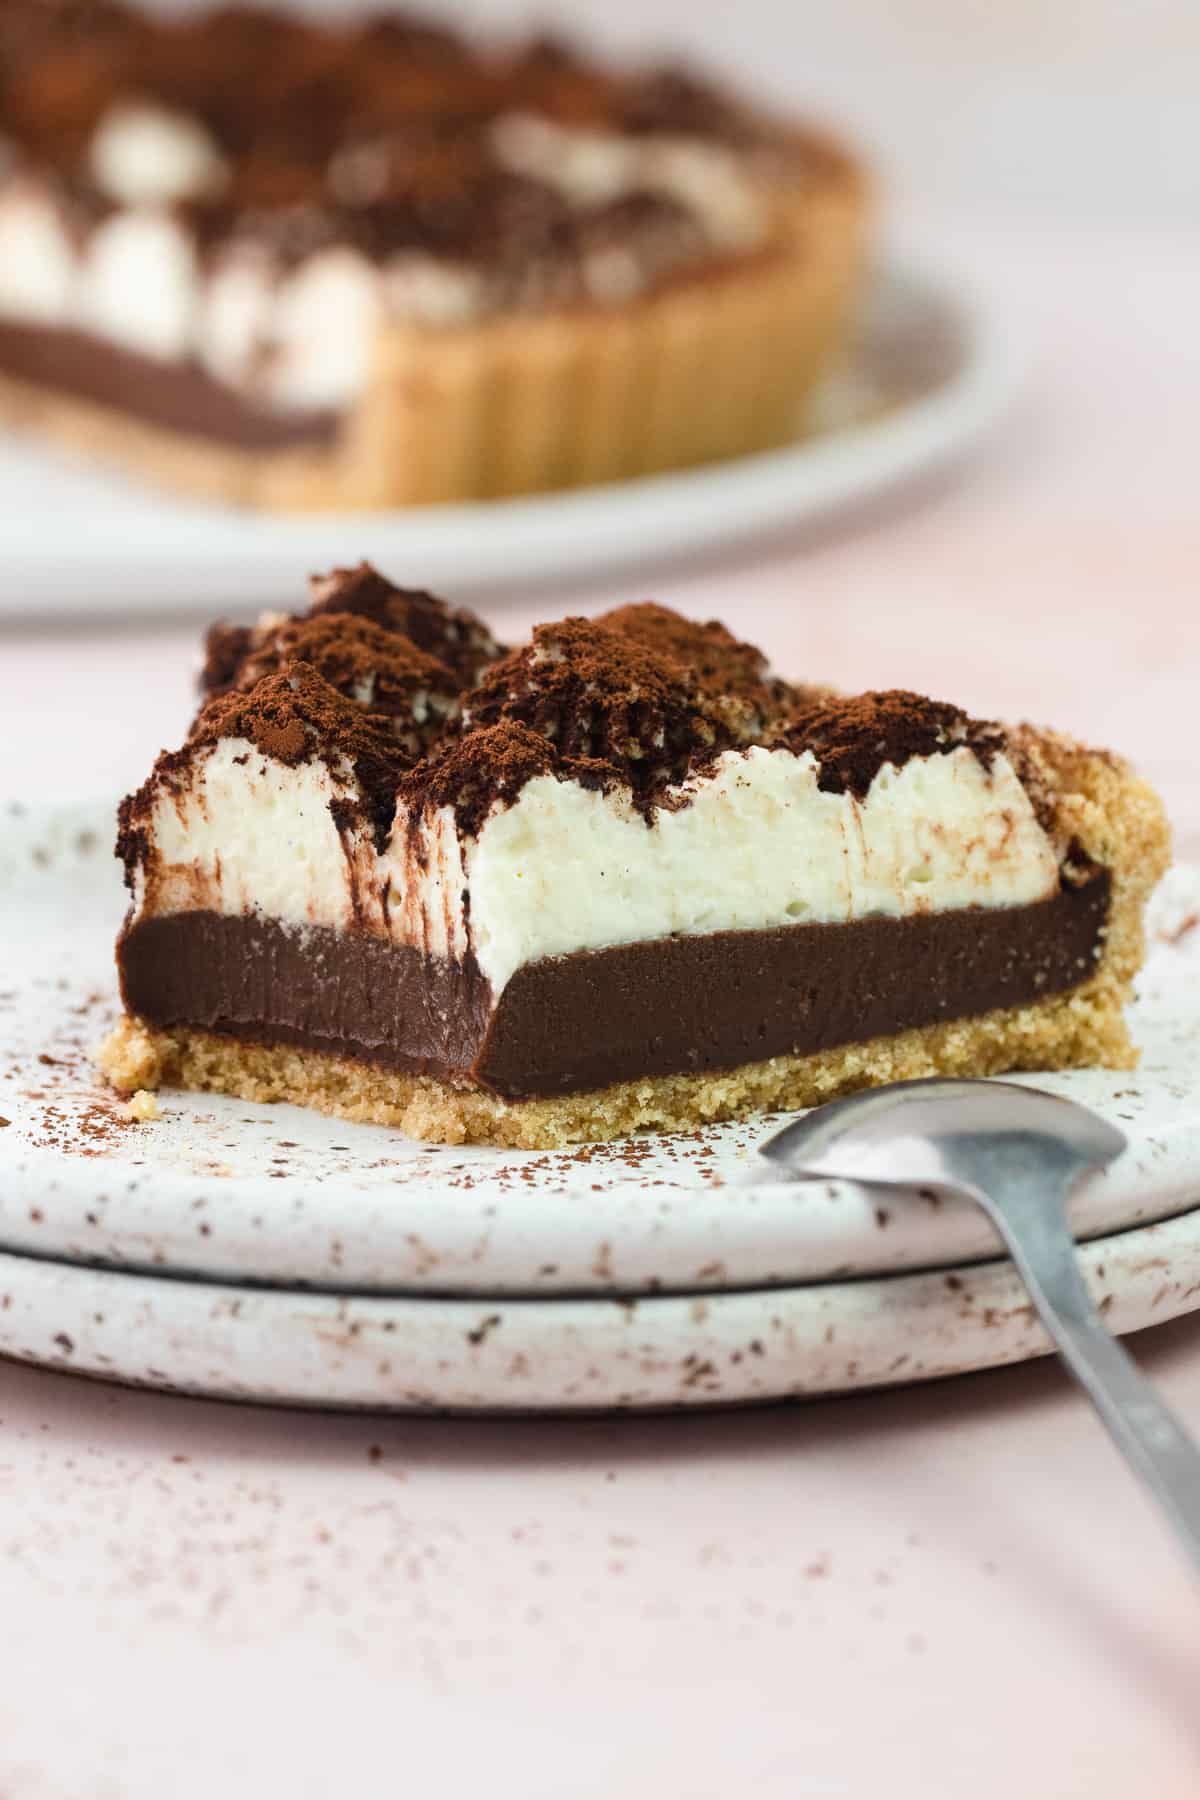
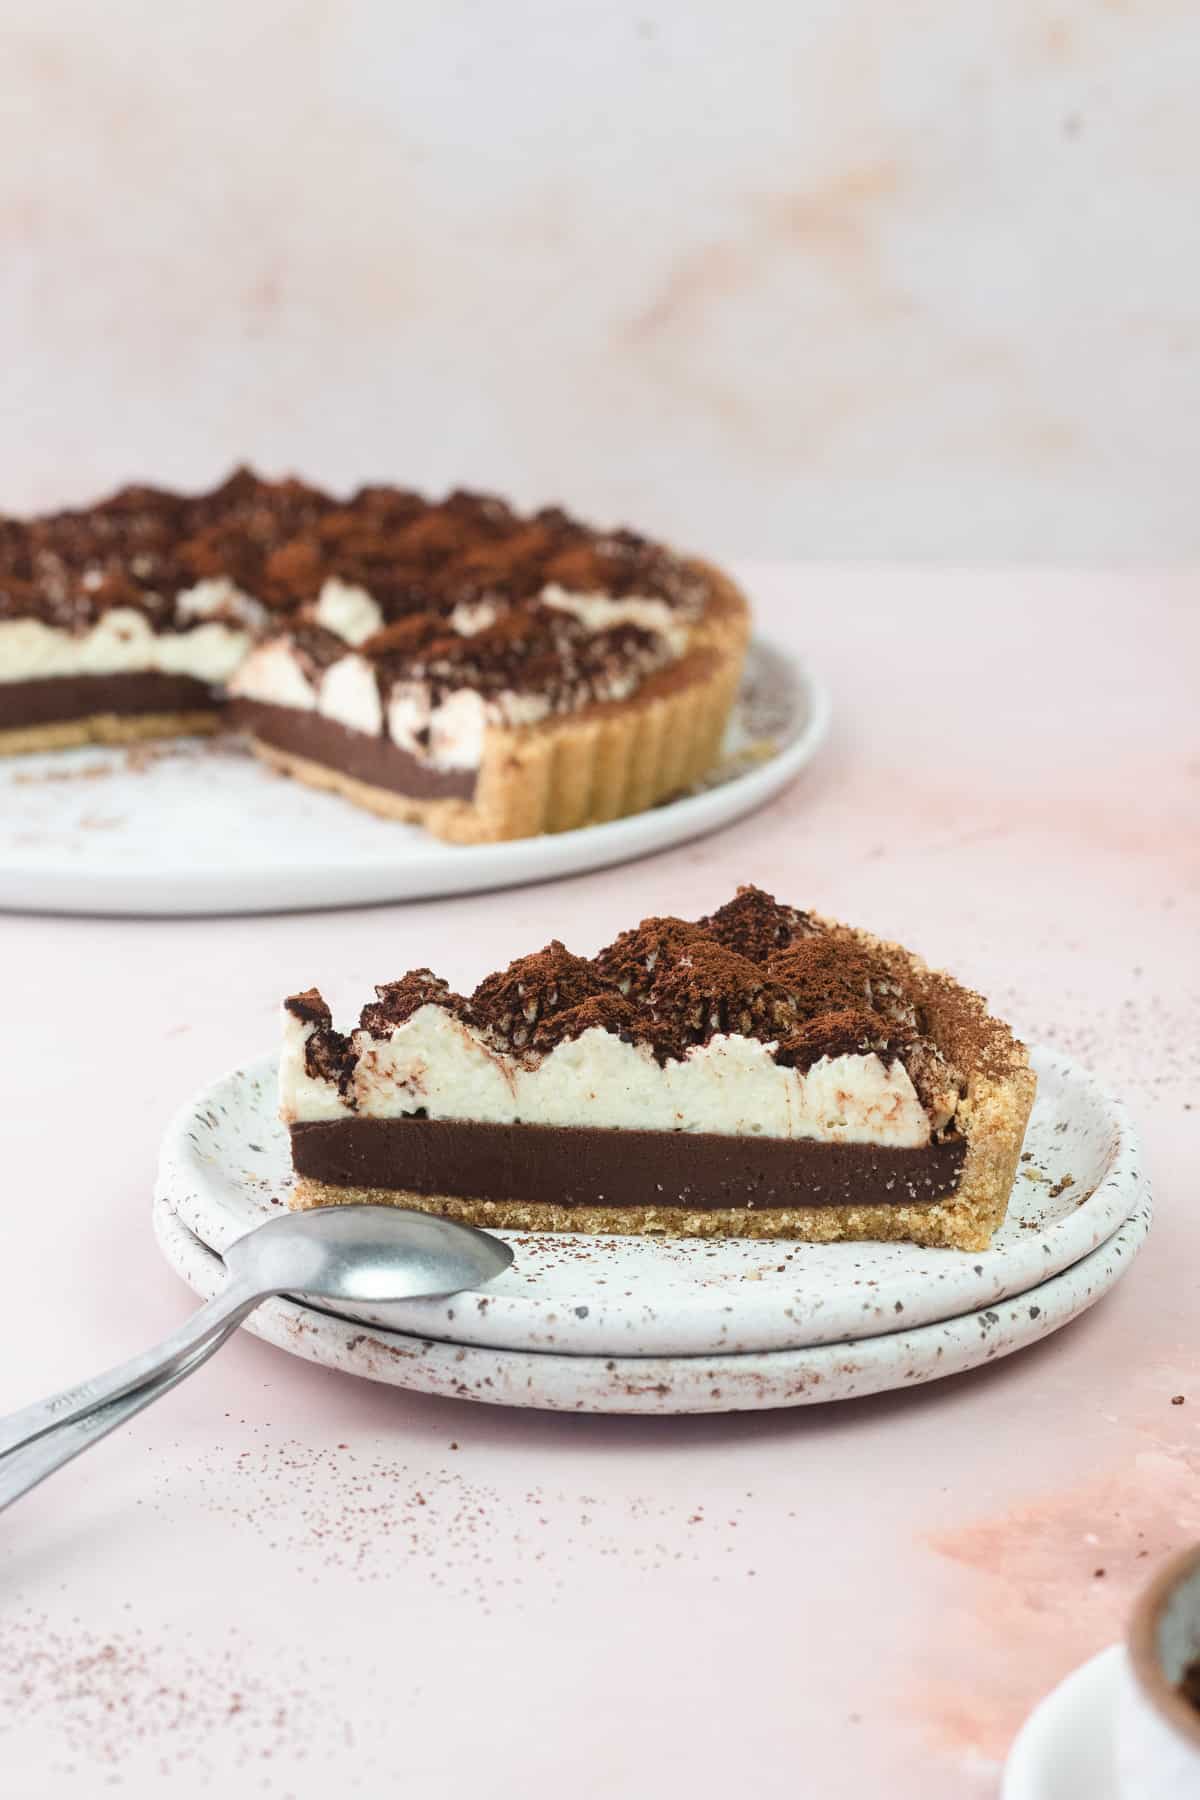
This irresistible Chocolate Espresso Tiramisu Tart is a fun twist on the traditional tiramisu dessert! It features an espresso scented ladyfinger cookie crust, an espresso chocolate ganache filling and a creamy mascarpone topping! It's also the perfect dessert to make ahead!
If you're looking for more tart recipes, you will love my Earl Grey Chocolate Tart, and Chocolate Cardamom Tart!
♡ Why You Will Love This Tiramisu Tart
- Easy to make. This is virtually a no-bake recipe, with the exception of the crust which goes in the oven for about 10 minutes. All the other components do not require any baking.
- No soggy mess. I love a classic tiramisu, but it can become soggy as it sits over time. This tiramisu tart is soggy-free and the crust even stays crisp!
- Can be made days in advance. You can plan ahead and make this tart up to 3 days in advance.

Jump to:
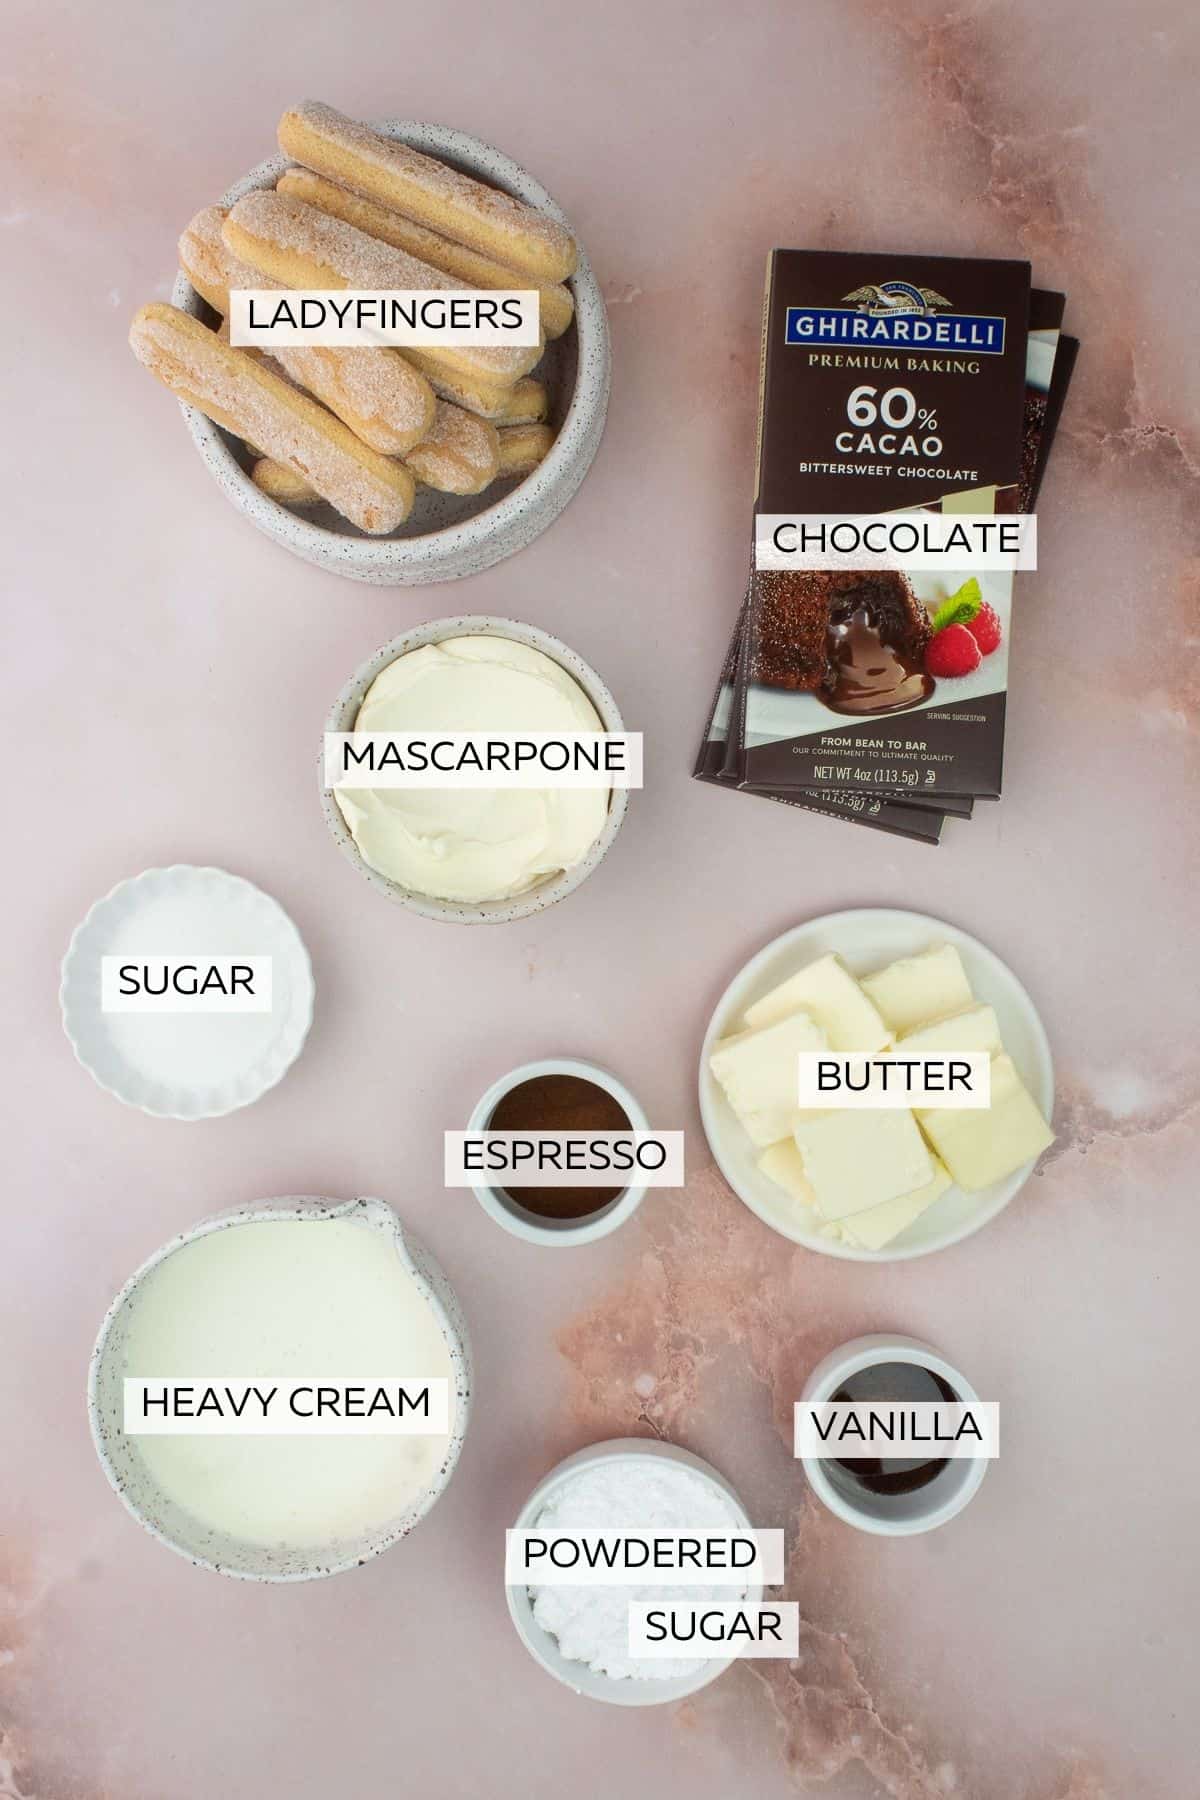
Ingredient Notes
Here are some notes about all the ingredients used in this Chocolate Espresso Tiramisu Tart. Quantities and full instructions are in the recipe card below!
Ladyfinger Cookie Crust
- Ladyfingers or Lady Finger - These Italian cookies are readily available at most major markets and Italian markets. I used Delallo's Ladyfingers (not an affiliate link).
- Unsalted Butter - Melted butter will be added to the cookie crumbs to help bind the crust.
- White Sugar - We'll be adding just a bit of sugar to add a hint of sweetness.
- Instant Espresso Powder - Since we are not soaking the ladyfingers in coffee, we are spiking the cookie crust with some instant espresso powder. My favorite espresso powder is also from Delallo (not an affiliate link).
Espresso Ganache Filling
- Dark Chocolate - Make sure to use a good quality chocolate. I used a 60% chocolate, which I think is the perfect balance of sweet and bitter.
- Instant Espresso Powder - To add even more coffee flavor, we are adding instant espresso powder into the filling.
- Heavy Cream - Helps create a creamy and decadent filling.
- Unsalted Butter (optional) - Softened butter is stirred into the filling to add richness, but is totally optional.
- Vanilla - You can use vanilla paste or vanilla extract.
Mascarpone Cream Topping
- Mascarpone - Adds a bit of tanginess to the creamy topping.
- Powdered Sugar - Also known as icing sugar and confectioners' sugar. Will help stabilize the topping.
- Vanilla - You can use vanilla paste or vanilla extract.
- Heavy Cream - The heavy cream is whipped until stiff peaks and then folded into the topping.
* See recipe card for a full list of ingredients and quantities.
Step-By-Step Instructions
Here are step-by-step photos and instructions on how to make this Tiramisu Tart! Please find the detailed instructions in the recipe card at the end of this post.

Step 1: Make the Crust - Finely pulse ladyfingers in food processor fitted with an 'S' blade. Then add the white sugar and espresso powder and pulse until combined.

Step 2: Pulse in the melted butter. The mixture should hold when pressed together. If it doesn't, you can add more melted butter.

Step 3: Bake the Crust - Transfer the crumbs to a 9-inch (23 cm) tart pan with a removable bottom. Using a small round measuring cup, firmly press the crumbs into the bottom and up the sides of the pan. Bake at 350ºF (178ºC) for about 10 minutes.

Step 4: Make Espresso Ganache - As the tart is cooling, start on the espresso ganache. In a medium bowl, submerge finely chopped chocolate and espresso powder with hot cream. Let stand, untouched for 5 minutes.
💡 Tip
Stir your ganache slowly and use a rubber spatula (not a whisk) to ensure a smooth ganache. Mixing it too quickly can create air bubbles and make the texture grainy.

Step 5: Gently stir until combined. Then stir in room temperature butter (if using) and vanilla.

Step 6: Chill the Tart - Pour filling into your tart shell and chill for 1 to 2 hours or for up to 3 days.

Step 7: Make Mascarpone Topping - When you are ready to serve, make your mascarpone topping. Add mascarpone cheese, powdered sugar and vanilla into a large bowl. With a hand-held mixer, whisk until combined.

Step 8: With the mixer still on medium speed, slowly add heavy cream to the mascarpone mixture and whip until you reach stiff peaks.

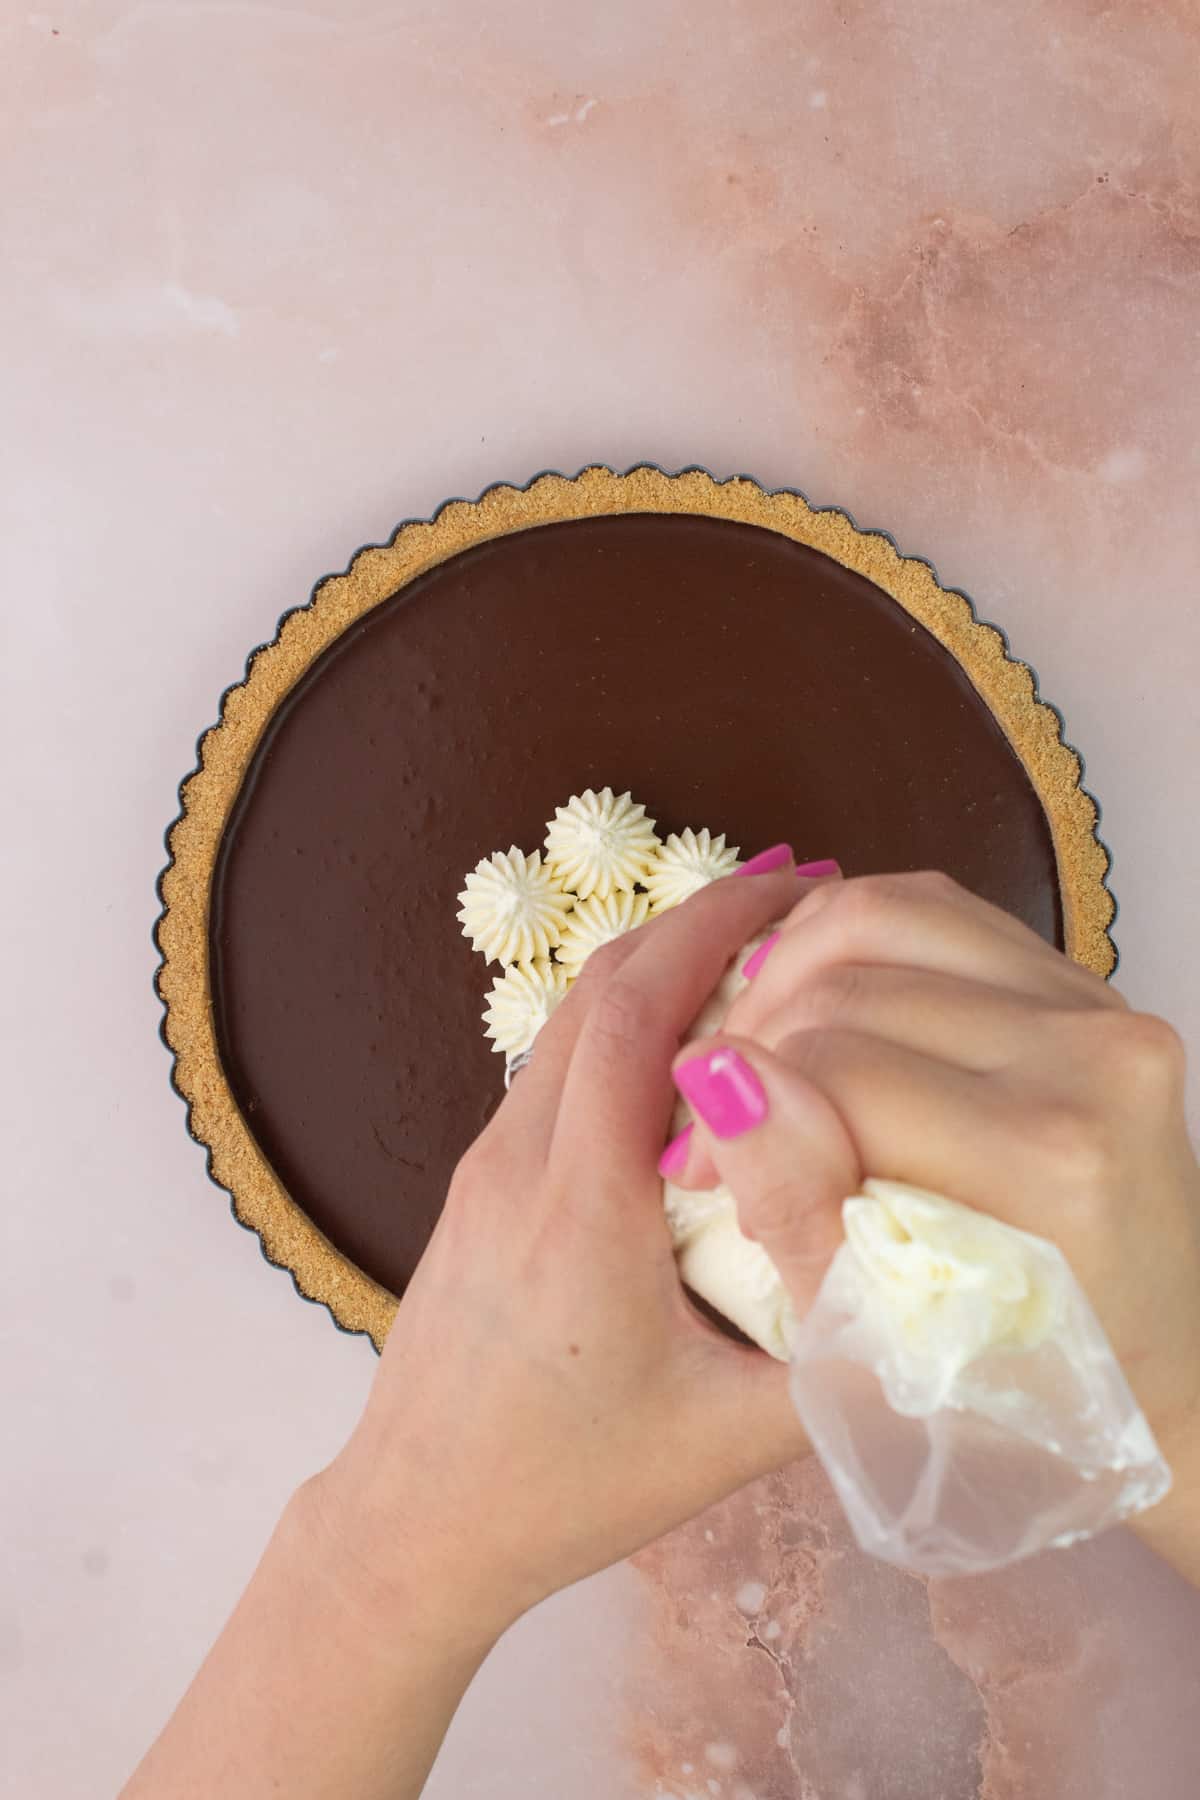
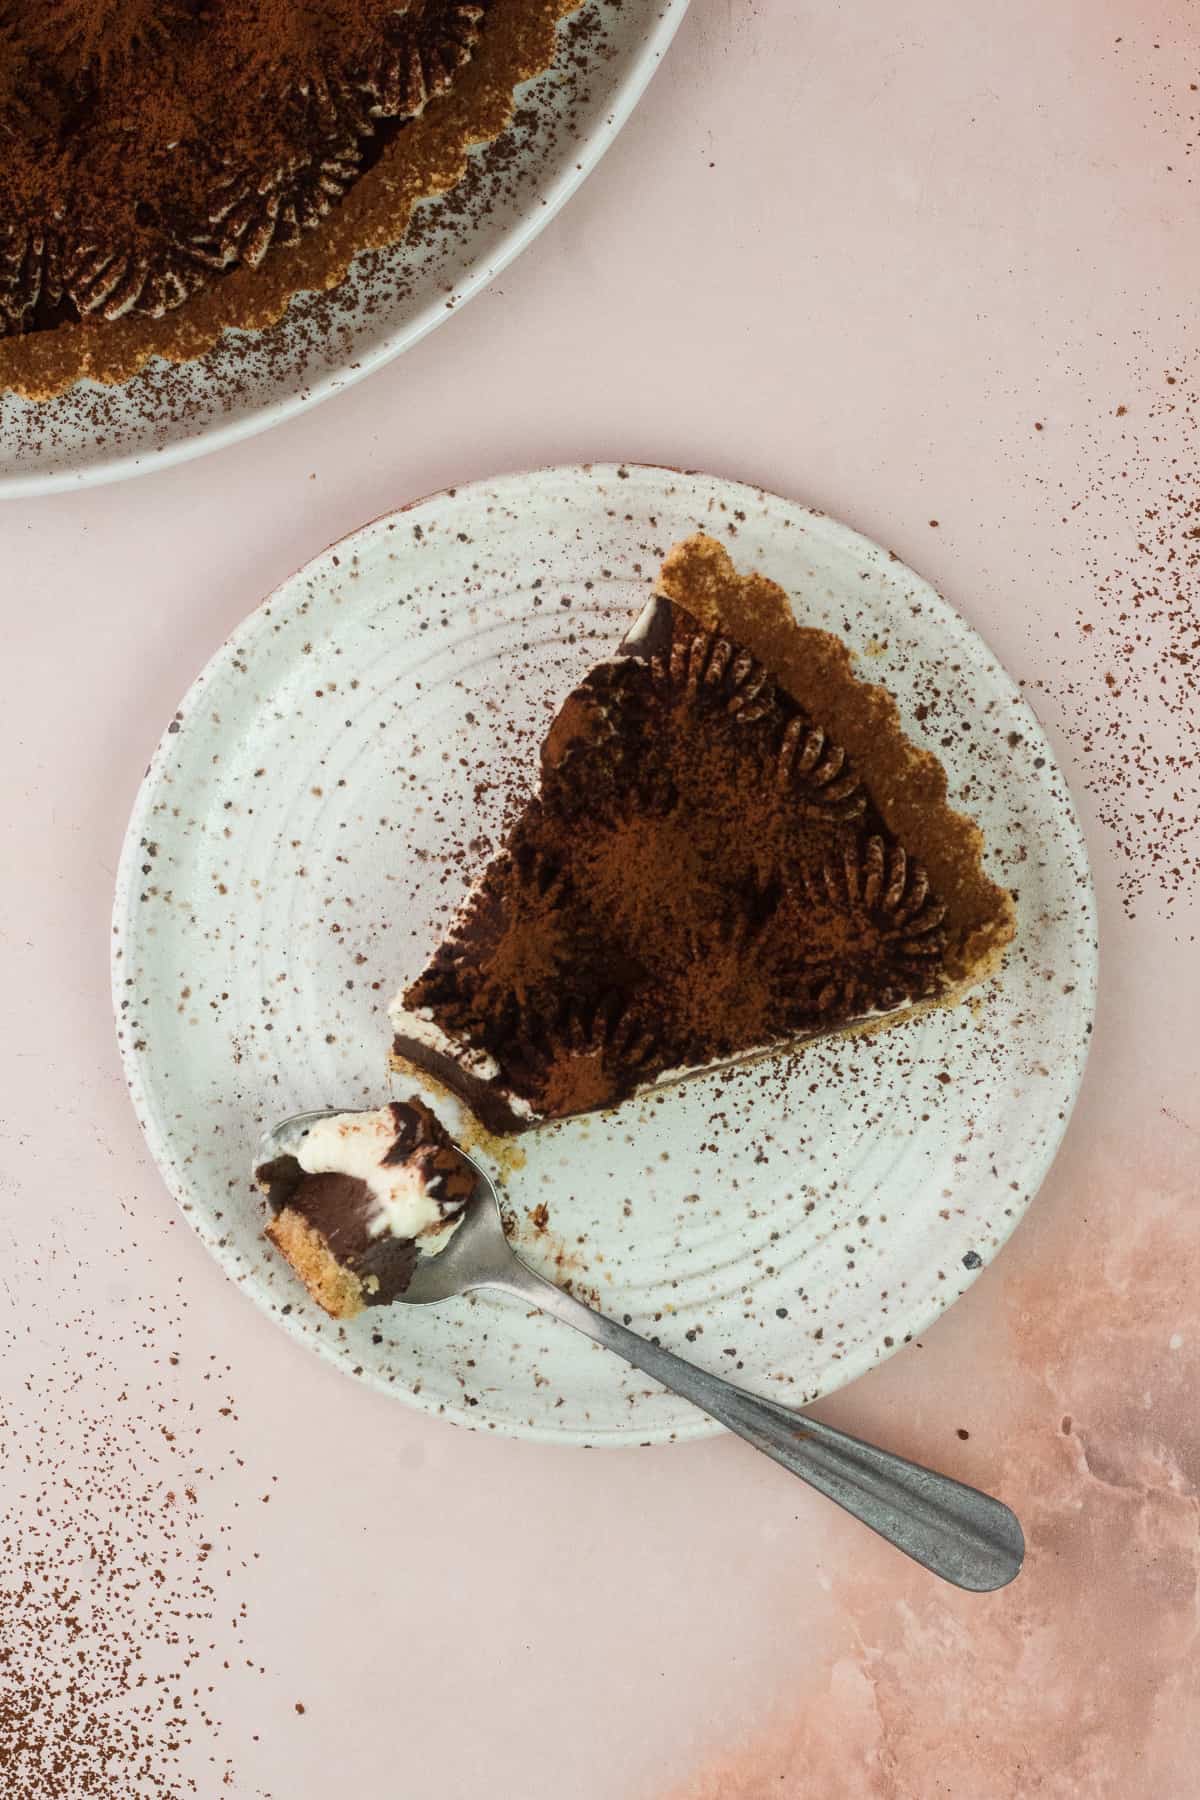
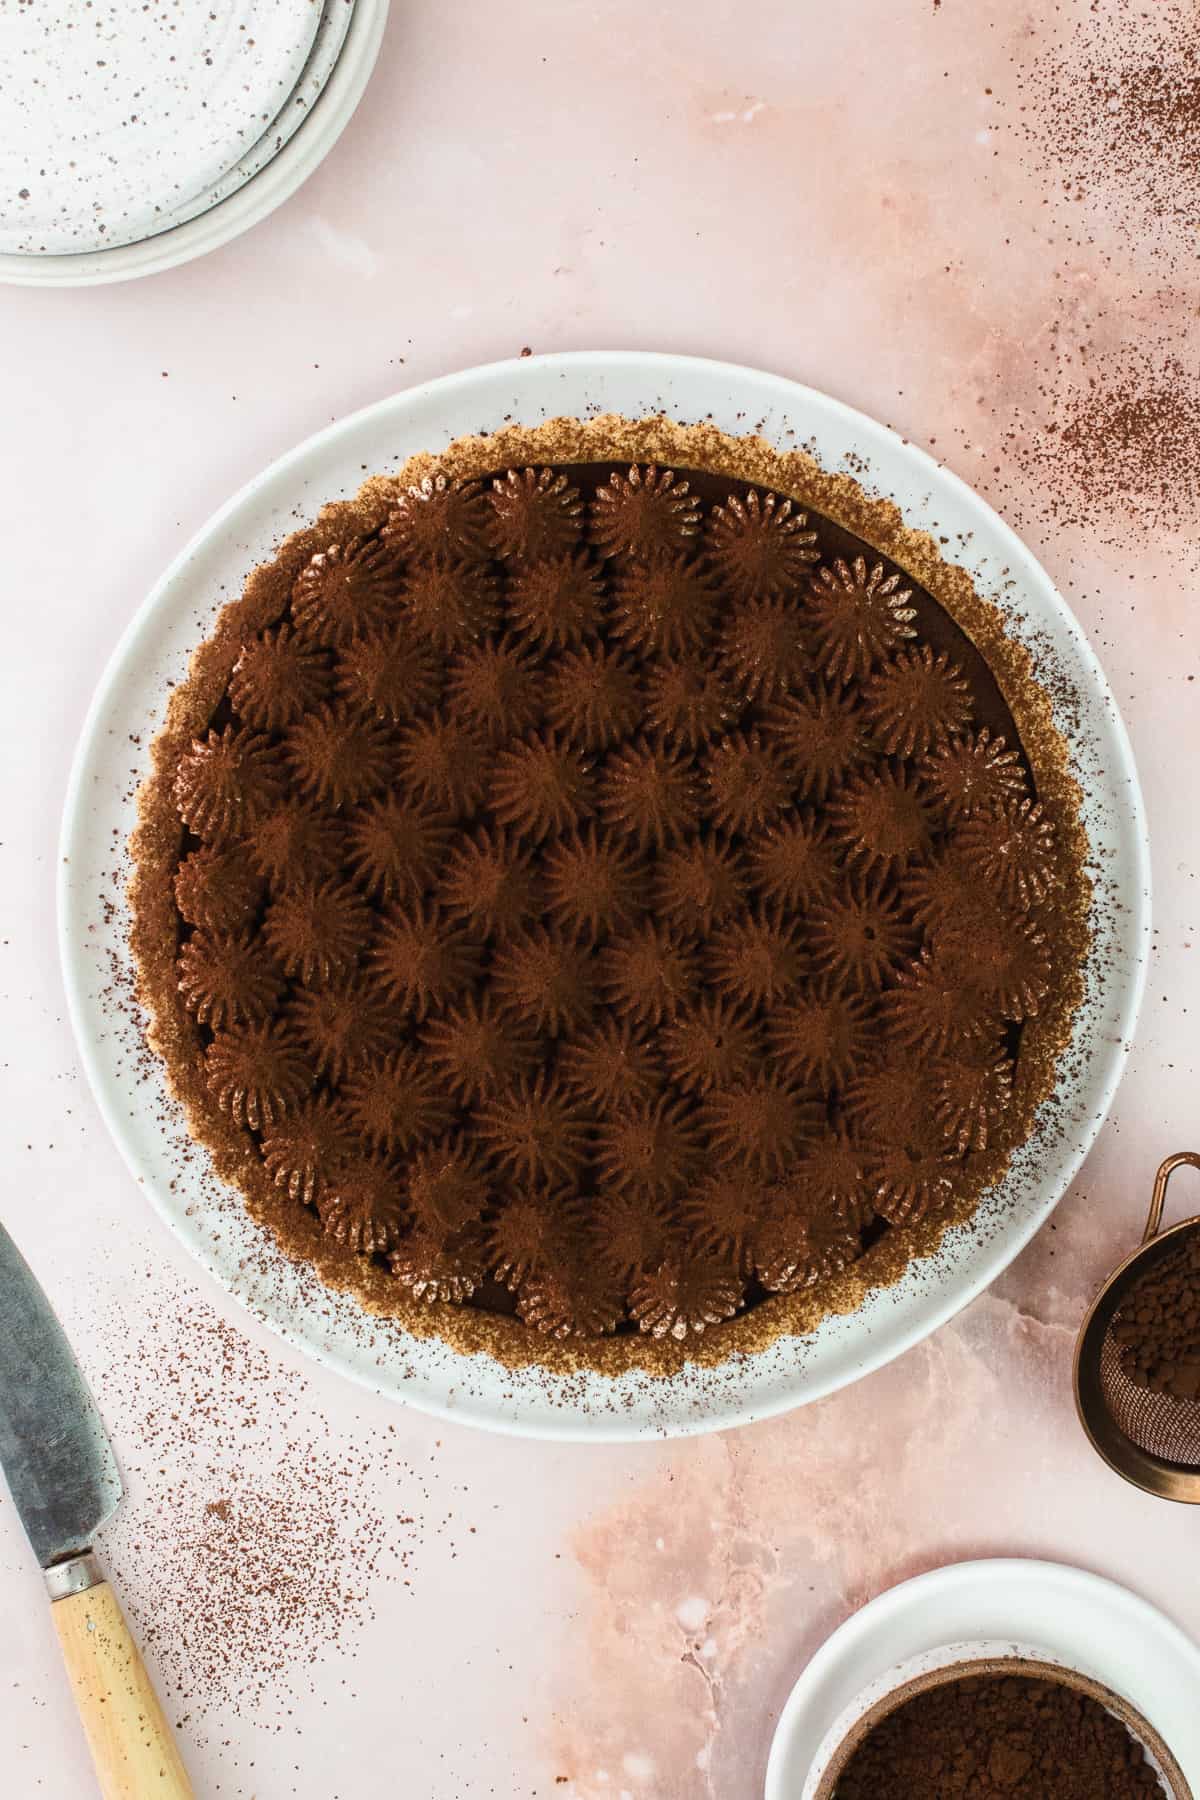
Step 9: Decorate & Serve - Transfer mascarpone topping to a piping bag fitted with a star tip or to a freezer bag with the tip cut off. Pipe the topping in a decorative pattern, sprinkle with cocoa powder and enjoy!

Substitutions
- Ladyfingers - If you don't have ladyfingers, you can use graham crackers, biscoff crackers or digestive biscuits.
- Mascarpone - If you are unable to find mascarpone, you can use cream cheese from the block (not whipped cream cheese).
- Powdered Sugar for Mascarpone Topping - You can substitute powdered sugar for white granulated sugar. Just reduce to ¼ cup (50g).
Variations
- Tart Crust - Try making a sweet pastry crust or pâte sucrée instead. You can even infuse it with espresso or cocoa powder for a fun twist.
- Espresso Ganache - Try adding a little bit of coffee liqueur like Baileys or Kahlua! If you're not a huge fan of coffee or are trying to cut back on caffeine, you can omit the espresso and make a plain chocolate ganache.
- Make Individual Tarts - Try making mini Tiramisu tartlets. Mini desserts are always so special and festive!
Key Equipment
- 9-Inch (23 cm) round Tart Pan with a removable bottom
- Food Processor
- Bowls
- Spatula
- Hand-held mixer
- Star Tip
Storage
- Refrigerator - Store in an airtight container in the fridge for up to 4 days. Serve cold or allow to come to room temperature before serving.
💡 Expert Tips
Make sure you're using chocolate bars for the ganache. Chocolate chips contain soy lecithin to help them retain their shape so they may not melt as smoothly.
Chop the chocolate finely. To ensure that your chocolate melts easily in the ganache filling, make sure to finely chop it.
You'll want to heat the cream to about 180ºF (82ºC) for the ganache. This is considered the scalding temperature. You don't want to boil it, as it can split your ganache.
FAQ
Tiramisu is a classic Italian dessert. It is made of ladyfingers (savoiardi) dipped in coffee, layered with whipped mixture of eggs, sugar, and mascarpone cheese and finished with cocoa powder.
Ladyfingers, sometimes known as sponge fingers or savoiardi, are sweet sponge cake biscuits that are roughly shaped like fingers. They are very dry, light and crumbly.
Yes! After making and assembling the crust/filling, cover tightly with cling wrap and store in the fridge for up to 3 days. When you are ready to serve, make your mascarpone cream, decorate and enjoy!
More Showstopping Desserts
♡ Did you try this recipe?
Please consider leaving a star rating and review below. This provides helpful feedback to myself and other readers. Thank you so much!
📖 Recipe

Chocolate Espresso Tiramisu Tart
INGREDIENTS
Ladyfinger Cookie Crust
- 2 Cups (167g) Ladyfinger Cookie Crumbs
- 6 to 7 Tablespoons (85g to 98g) Unsalted Butter melted
- 2 Tablespoons White Sugar
- ¾ Teaspoon Fine Espresso Powder
Espresso Chocolate Filling
- 10 Ounces (283g) 60% Bittersweet Chocolate Bars finely chopped
- 1 ¼ Cups (284g) Heavy Whipping Cream
- 2 Teaspoons Fine Espresso Powder
- 1 Teaspoon Vanilla Paste or Extract
- 2 Tablespoons (28g) Softened Unsalted Butter see note below
Mascarpone Cream Topping
- 8 Ounces (227g) Mascarpone Cheese cold
- ¼ Cup (29g) Powdered Sugar
- 1 Teaspoon Vanilla Paste or Extract
- 1 Cup (227g) Heavy Whipping Cream cold
Instructions
- Preheat Oven - Set a rack in the center of the oven and preheat to 350ºF (180ºC).
- Make the Crust - Finely pulse ladyfingers in a food processor fitted with an 'S' blade. Add white sugar and espresso powder and pulse until combined. Then pulse in the melted butter. The mixture should be able to hold when squeezed together. If needed, add more melted butter.2 Cups (167g) Ladyfinger Cookie Crumbs2 Tablespoons White Sugar¾ Teaspoon Fine Espresso Powder6 to 7 Tablespoons (85g to 98g) Unsalted Butter
- Bake Crust - Transfer the crumbs to your 9-inch (23 cm) tart pan with a removable bottom. Using a small round measuring cup or cup, firmly press the crumbs into the bottom and up the sides of the pan. Bake for 10 minutes and allow the crust to cool in the tart pan on a wire rack.
- Make Espresso Ganache Filling - Finely chop the chocolate bars and transfer to a heatproof bowl, along with the espresso powder. Heat heavy cream in a small saucepan just until simmering, about 180ºF (82ºC). Then pour hot cream over the chocolate and espresso powder and let stand, untouched for 4 to 5 minutes. Gently mix to combine, then stir in room temperature butter (if using) and vanilla.10 Ounces (283g) 60% Bittersweet Chocolate Bars1 ¼ Cups (284g) Heavy Whipping Cream2 Teaspoons Fine Espresso Powder2 Tablespoons (28g) Softened Unsalted Butter1 Teaspoon Vanilla Paste or Extract
- Chill Tiramisu Tart - Pour the filling into your baked tart shell and chill in the fridge for 1 to 2 hours or for up to 3 days. Cover if chilling for a longer period.
- Make Mascarpone Topping - Add mascarpone cheese, powdered sugar and vanilla into a large bowl. With a hand-held mixer, whisk until combined. With the mixer on medium speed, slowly add heavy cream to the mascarpone mixture and whisk until you reach stiff peaks.8 Ounces (227g) Mascarpone Cheese¼ Cup (29g) Powdered Sugar1 Teaspoon Vanilla Paste or Extract1 Cup (227g) Heavy Whipping Cream
- Decorate & Serve - Transfer mascarpone topping to a piping bag fitted with a star tip or to a freezer bag with the tip cut off. Pipe the topping in a decorative pattern, sprinkle with cocoa powder and enjoy!
Julie P says
I made this tart this past weekend for my family and it was a hit! I didn’t have mascarpone cheese so I used cream cheese instead and it was perfect. Next time I make it I will make mini tarts!
Lisa says
Hi Julie, I'm so happy it was a hit with you and your family! Cream cheese is a great substitution and you can never go wrong with mini tiramisu tarts!
Sophia C. says
I made a mini version of these, but I used a shortbread crust because I had the ingredients available. It turned out so delicious! Thank you for the recipe!
Lisa says
Hi Sophia, I'm so happy to hear that you enjoyed this recipe! I'll have to try it with a shortbread crust one of these days. Thank you for your wonderful review!☺️
Iris says
Such a delicious recipe, giving a fun and sophisticated twist to the classic tiramisu. The recipe is super easy to follow. This tart is a real showstopper!
Lisa says
Aww, I'm so happy you enjoyed this tart! Thank you so much for your lovely review! ❤️
Amanda (bakerhorne_) says
This recipe was incredibly easy to follow and it was super helpful that the ingredients were listed in grams as well as cups as we don’t really use cups here in the UK. The overall tart was delicious and I’ll 100% make it again. This recipe is a keeper! Xx
Lisa says
Yay, I'm so happy you enjoyed this recipe! It's one of my favorite tarts! Thank you for your wonderful review! ❤️
Ruth Spinks says
My only comment was the ganache was very solid having been in the fridge
Luckily, I chilled it before I topped it with the mascarpone so I let it come to room temperature, then topped it with the chilled mascarpone mixture and served it like that