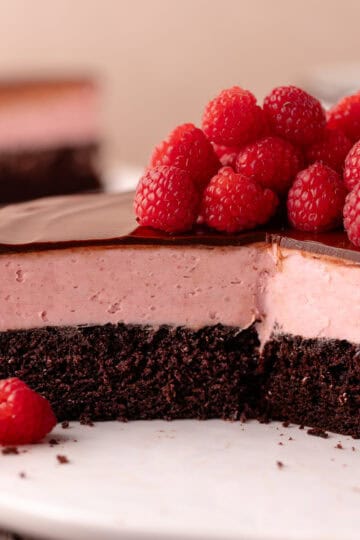
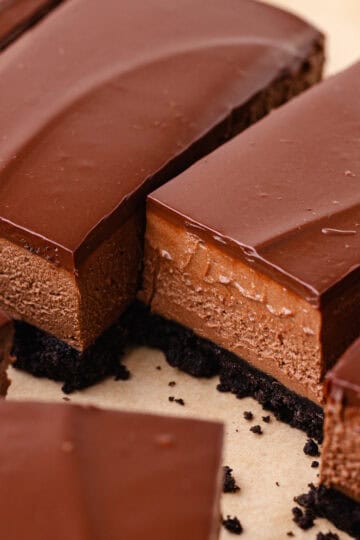
Mexican Hot Chocolate Pots de Crème! The creamiest and dreamiest French chocolate custard is scented with warm cinnamon and spiked with cayenne pepper!

What Is Pot de Crème?
Pot de crème, literally means, "pot of cream." It's a French custard that is usually baked and can be made in a variety of different flavors. It is thicken by tempering egg yolks, thus creating a rich and decadent custard.

Mexican Hot Chocolate Pot De Crème Ingredients

- Chocolate - High quality bittersweet chocolate is recommended for this recipe, between 60% to 79%. If you do use milk chocolate, you may need to adjust the sugar level.
- Cream - Heavy whipping cream makes the pot de créme rich and creamy.
- Milk - Use whole milk as it will add to the richness.
- Sugar - This recipe is perfectly sweetened.
- Cinnamon - I love using Vietnamese cinnamon, but use your favorite.
- Cayenne Pepper - Do not leave this ingredient out! You can add as little or as much as you like. The subtle heat is what makes this Mexican hot chocolate pot de créme so special. I love the juxtaposition of the cold custard with the subtle kick of heat. It just makes you want to dive in for more and more. Everyone's spice tolerance varies, so start with ⅛ teaspoon and go up from there. I ended up adding over ¼ teaspoon of cayenne pepper.
- Salt - Salt will round out the flavors and balance the sweetness.
- Egg Yolks - The yolks not only thickens the custard, it also makes it rich and creamy.
- Vanilla Extract or Paste - Vanilla adds another layer of flavor.
Step By Step Instructions
- Finely chop your chocolate and transfer to a medium sized heat-proof bowl. Melt chocolate over a steaming pot of water or in the microwave, in 30 second bursts. Whisk until smooth and set aside to cool.
- Add cream, milk, ¼ cup (50 grams) of sugar, cinnamon, cayenne pepper and salt in a saucepan. On medium/low heat, bring the mixture to a low boil.


- Meanwhile, seperate your eggs. Place the yolks in a medium sized bowl and save your egg whites for another use. Whisk the yolks and 1 tablespoon (12.5 grams) of sugar until light and pale in color.
- Transfer the cooled melted chocolate to your yolks and mix until well combined.


- Next, temper the mixture by adding ¼ cup (57 grams) of the hot cream/milk mixture into the chocolate/yolk mixture. Remember to whisk continuously. Continue whisking in another ¼ cup, until at least half of the cream/milk mixture has been incorporated.
- Transfer chocolate/yolk mixture into the saucepan, whisking continuously.


- Stir in vanilla. At this point, adjust your cinnamon and cayenne pepper.
- Once you are happy with the taste, strain the mixture into a medium sized bowl, preferably with a pour spout. Skim mixture if needed.


- Place ramekins or glass jars into a large baking pan. Evenly pour custard two thirds full into each ramekin or jar. Depending on the size of your vessel, you will end up between 4 to 6 portions. My glass jars are 5 oz each and I ended up with 6 portions.
- Fill the baking pan halfway up with hot tap water. Bake at 325ºF for about 30 minutes. Do not overbake. Please keep in mind that your bake time can vary, as oven temperatures run differently. The size of your ramekins or jars can also affect your bake time as well. Please check on your custard after 25 minutes. It's ready when the sides are set but is still jiggly in the middle. My jars took 30 minutes.


Do yourself a favor and make this now! You will be in chocolate heaven...

♡ Did you try this recipe?
Please consider leaving a 5-star rating and review below. This provides helpful feedback to myself and other readers. Thank you so much!
📖 Recipe

Mexican Hot Chocolate Pots de Crème
The creamiest and dreamiest Mexican Hot Chocolate Pots de Crème! This INCREDIBLE French chocolate custard is scented with cinnamon and spiked with cayenne pepper!
INGREDIENTS
- 6 Oz (170g) Bittersweet or Dark Chocolate chopped and melted
- 1 ½ Cup (354g) Heavy Whipping Cream
- ½ Cup (114g) Whole Milk
- ¼ Cup + 1 tablespoon (50g + 12g) Sugar divided
- ¾ teaspoon Cinnamon or to taste
- ⅛ to ¼ teaspoon Cayenne Pepper
- ¼ teaspoon Salt
- 4 Large Egg Yolks
- 1 teaspoon Vanilla
Instructions
- Adjust an oven rack to the center and preheat your oven to 325ºF (126ºC).
- Finely chop your chocolate and transfer to a medium sized heat-proof bowl. Melt chocolate over a steaming pot of water or in the microwave, in 30 second bursts. Whisk until smooth and set aside to cool.6 Oz (170g) Bittersweet or Dark Chocolate
- Add cream, milk, ¼ cup sugar, cinnamon, cayenne pepper and salt in a saucepan. On medium/low heat, bring mixture to a low boil.1 ½ Cup (354g) Heavy Whipping Cream½ Cup (114g) Whole Milk¼ Cup (50g) Sugar¾ Tsp Cinnamon⅛ to ¼ Tsp Cayenne Pepper¼ Tsp Salt
- Meanwhile, seperate your eggs. Place the yolks in a medium sized bowl and save your egg whites for another use. Whisk the yolks and 1 tablespoon (12g) of sugar until light and pale in color. 4 Large Egg Yolks1 tablespoon (12g) Sugar
- Transfer the cooled melted chocolate to your yolks and mix until well combined.
- Next, temper the mixture by adding ¼ cup (57 grams) of the hot cream/milk mixture into the chocolate/yolk mixture. Remembering to whisk continuously. Continue whisking in another ¼ cup, until at least half of the cream/milk mixture has been incorporated.
- Add the chocolate/yolk mixture into the saucepan, while whisking continuously.
- Stir in vanilla. At this point, adjust your cinnamon and cayenne pepper.1 Tsp Vanilla
- Once you are happy with the taste, strain the mixture into a medium sized bowl, preferably with a pour spout. Skim mixture if needed.
- Place ramekins or glass jars into a large baking pan. Evenly pour custard two thirds full into each ramekin or jar. Depending on the size of your vessel, you will end up between 4 to 6 portions. My glass jars are 5 oz each and I ended up with 6 portions.
- Fill the baking pan halfway up your ramekins or glass jar with hot tap water. Bake for about 30 minutes. Do not overbake. It's ready when the sides are set and the middle is still jiggly.
- Place your pot de créme on a wire rack to cool for about 20 minutes. Then place in the fridge to chill for at least 4 hours before serving.
- Serve with fresh whipped cream and a dash of extra cayenne or cinnamon or both! Enjoy!
Notes
- Please keep in mind that your bake time can vary, as oven temperatures run differently. The size of your ramekins or jars can also affect your bake time as well. Please check on your custard after 25 minutes. It's ready when the sides are set but is still jiggly in the middle. My jars took 30 minutes.
- Your pot de créme will keep for 4 to 5 days in the fridge, making it ideal to make ahead.
Did you try this recipe?Share your photo and tag us @shortstackkitchen on Instagram!


Mary says
I tried this recipe and it turned out amazing! Thanks for sharing.
Lisa says
Yay, I'm so glad you loved it! Thank you so much for trying it!