
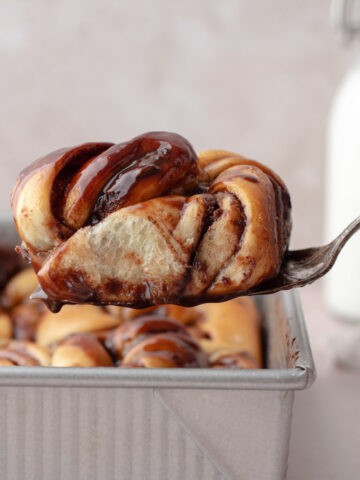
Homemade Chocolate Babka – Amazing homemade babka filled with swirls of bittersweet chocolate, soaked in simple syrup and topped with a silky chocolate glaze!

WHAT IS BABKA?
Babka is a Jewish yeast bread that is enriched with eggs, milk and butter. It’s essentially a brioche bread that is usually filled with cinnamon or chocolate and then braided into loaves. The texture of babka is somewhat firm and slightly dry, but layered with a gooey filling and topped with a streusel.

The first time I heard of babka was through one of my favorite shows, Seinfeld. I was so curious after watching reruns of that episode, that I went to my local Jewish bakery and picked up a loaf of chocolate babka. It was incredible! It had a crunchy streusel topping and was beautifully marbled with layers and layers of dark chocolate. I was hooked!

HOMEMADE CHOCOLATE BABKA RECIPE TESTING
I was at Trader Joes not too long ago and saw some chocolate babka in the bakery section and I got to craving it. I nearly picked up a loaf, but I decided that I would figure out how to make it from scratch instead. I mean how hard could it be, right? I’ve made enriched doughs before. Well, 7 babka loaves later, I finally nailed it! My final babka recipe is light, airy and SO soft. The cinnamon scented chocolate swirls are so gooey and the extra chocolate glaze on top just takes it to another level. It’s delicious!!
- Melted Butter vs Softened Butter – Although both versions tasted delicious, the structure of the butter made a big difference. Melted butter made the babka slightly dense, while the softened butter made the babka more light and airy. The amount of butter also made a difference. Adding too much butter made the dough too soft, making it too cake-like. Not adding enough butter, made the babka dry and flavorless. I found that 6 tablespoons of softened butter was perfect.
- Whole Eggs vs Whole Egg + Yolk – I played around with the amount of eggs and using 1 whole egg plus 1 yolk yielded the best loaf. It was more tender, compared to using whole eggs.
- Ratio of Flour – My initial recipe I tested started with 2 ¼ cups (270 grams) of flour. The amount of flour was just a little too much, making the loaf a little dry. I decided to cut the flour by ¼ cup in the next recipe, but the dough had no height or structural integrity. After that disaster, I decided to alter the flour slightly, to 2 cups + 2 tablespoons (254 grams). That slight adjustment turned out to be the perfect amount.
- Ratio of Yeast – Boy, was this a test fun! I started with a packet of active dry yeast, which is 2 ¼ teaspoons (7 grams) and the loaf was ginormous! Although it looked impressive, it was waaay too dry and airy. After playing with the amount of yeast, 1 ¾ teaspoons (6 grams) was the perfect amount.
- Slow Overnight Rise vs. Quick Rise – I much prefer the slow overnight rise in the fridge because the dough is much easier to work with. I was able to use less flour, thus creating a lighter and softer babka. Additionally, the flavor developed much more as it sat in the fridge.
- Cinnamon in the Chocolate filling? I made several chocolate fillings and one became the clear winner. Bittersweet chocolate with a hint of cinnamon! I made a version with a combination of bittersweet chocolate and milk chocolate, but it was much too sweet. I then made a hazelnut chocolate spread. Although it was delicious, the hazelnut flavor got lost in the baking process. I then made a plain bittersweet chocolate filling, but it a bit boring and a little chalky after the bake. I decided to go with the bittersweet chocolate version, but added heavy cream and some Vietnamese cinnamon and bam! It was the perfect filling.


HOMEMADE CHOCOLATE BABKA INGREDIENTS
- Yeast – I prefer to use Active Dry Yeast.
- Milk – Whole milk is best. The fat will result in a softer dough.
- Sugar – We will lightly sweeten the dough with granulated white sugar.
- Eggs – We will be using 1 whole egg and 1 yolk. The extra yolk will make for a tender dough.
- Vanilla Extract – You can use vanilla extract or vanilla paste.
- All-Purpose Flour
- Nutmeg – Nutmeg is optional, but it lightly scents the dough.
- Salt – Just a little to balance the sweetness.
- Unsalted Butter – Adding softened butter will make the dough really light and airy. Make sure your butter is softened, which is softer than room temperature butter. It will be easier to incorporate into the dough.

SHAPING THE DOUGH
- Roll out your dough to about a 12×16 inch (30×40 cm) rectangle.
- Spread an even layer of your chocolate filling, leaving a half inch (1.2cm) border all around.


Method 1
- Tightly roll your dough into a log, starting on the shorter side. Place it seam side down.
- With a sharp knife, cut your log in half lengthwise.


- Braid and twist the dough and bring the ends together. You may need to trim the ends depending on the size of your loaf pan.
- Transfer your braided loaf into your prepared loaf pan and let proof at room temperature for 1 to 1 ½ hours.


Method 2 (the method I used)
- Tightly roll the dough lengthwise into a log.
- Cut the log into two equal pieces.


- Place one log on top of the other, forming a cross.
- Gently twist the two logs together, making sure the skinnier end meets the larger end. Transfer into your prepared loaf pan and let proof at room temperature for 1 to 1 ½ hours.


EXPERT TIPS
- Use a stand mixer if you can. The dough can be quite sticky. Having the machine do all the heavy lifting will make life easier.
- Measure your ingredients correctly, especially your flour. I always recommend using a digital scale. However, if you do not own one, aerate and fluff up your flour, then spoon into your measuring cup and then level off with the back of a knife.
- Chilling the dough is important. No exceptions. This dough is very soft and somewhat sticky and will need to chill for at least 8 hours to properly set. It will make it easier to roll out.
- Follow the recipe exactly. I know it can be tempting to stray from a recipe (I’m guilty of that), but making adjustments, whether big or small can change the final result.
- How to know when your dough is done proofing – Proofing refers to the final rise right before baking. You know when your loaf is ready for the oven, when you are able to make an indentation with your finger and it does not bounce back. If your indentation bounces back immediately, then it’s not ready yet.
- After 20 minutes of baking, check on your babka – You may need to loosely tent your babka with foil if it gets too brown. Every oven runs differently, so it’s good to check.
- As soon as the babka comes out of the oven, brush it with simple syrup. It will help lock in the moisture as babka can dry out easily.
Making babka is definitely a labor of love. I wouldn’t say making babka is difficult, however, there are many steps and it does require a lot of patience. But trust me, it will be worth it in the end. Happy baking!

Measuring By Weight
Measuring ingredients by weight, rather than by volume, is the most accurate way to bake. Unfortunately, not all measuring cups are created the same, so your one cup will be different from my one cup. Additionally, there are measuring cups that are specifically designed for liquid and for dry ingredients. I highly recommend purchasing an inexpensive kitchen scale and weighing your ingredients to prevent any inaccuracies. For your convenience, my recipes are written in grams, with the exception of teaspoons/tablespoons, to ensure your bakes come out perfect every time!
If you would like to learn more about measuring by weight, you can refer to King Arthur’s ingredient weight chart.

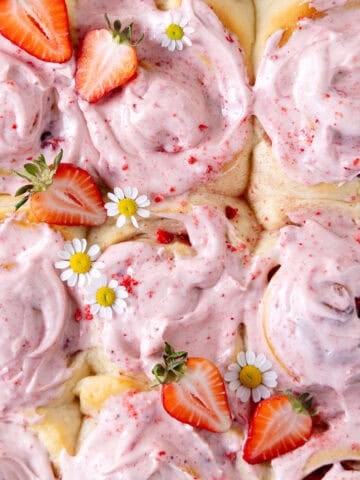
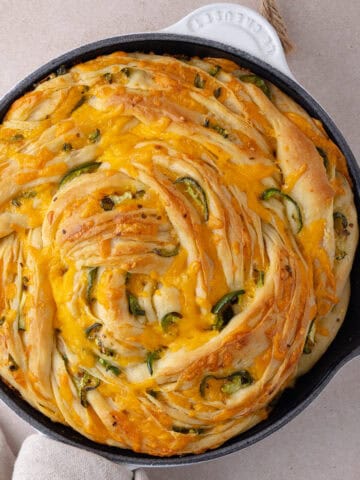
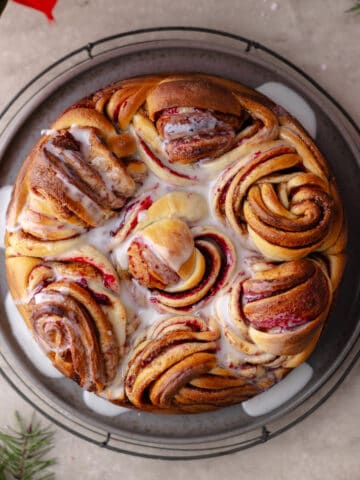
YOU MAY ALSO LIKE


Recipe

CHOCOLATE BABKA
- Total Time: Overnight
- Yield: 1 Loaf 1x
Description
Amazing homemade babka filled with swirls of bittersweet chocolate, soaked in syrup and topped with a chocolate glaze!
Ingredients
Babka Dough
- ¼ Cup (56 grams) Whole Milk
- 1 ¾ Tsp (6 grams) Active Dry Yeast
- ¼ Cup + 1 teaspoon (50 grams + 5 grams) Granulated White Sugar
- 1 Large Egg + 1 Yolk
- 1 Tsp Vanilla Extract
- 2 Cups + 2 tablespoon (254 grams) All-Purpose Flour
- ¼ Tsp Nutmeg
- ¼ Tsp Salt
- 6 Tbsp (85 grams) Unsalted Butter, softened
Chocolate Filling
- ¼ Cup (56 grams) Heavy Whipping Cream
- 4 Tbsp (56 grams) Unsalted Butter
- ¼ Cup (50 grams) Granulated White Sugar
- 5 oz (141 grams) Bittersweet Chocolate, chopped
- ¼ Cup (25 grams) Cocoa Powder, sifted
- ¼ Cup (25 grams) Confectioners Sugar, sifted
- ½ Tsp Vanilla Extract or Vanilla Paste
- ½ Tsp Cinnamon
Simple Syrup
- 3 Tbsp (37 grams) Granulated White Sugar
- 3 Tbsp (44 grams) Water
Chocolate Glaze
- 6 oz (170 grams) Bittersweet Chocolate
- 2 oz (56 grams) Milk Chocolate
- 6 Tbsp (85 grams) Unsalted Butter
- 1 Tbsp (20 grams) Corn Syrup, optional for shine
Instructions
Babka Dough
- In a small clean bowl, activate yeast by combining warm milk (110ºF or 43ºC), 1 teaspoon of sugar (5 grams) and yeast. Cover with a tea towel and allow to sit for 8 to 10 minutes. Yeast should double in size and become frothy.
- In the bowl of your stand mixer fitted with a hook attachment, add yeast mixture, sugar, egg, yolk, vanilla extract and mix on medium/low until roughly combined.
- Add flour, salt and nutmeg and mix on medium/low until a rough ball of dough forms. About 3 minutes. Remember to scrape down the sides and bottom of the bowl.
- Add softened butter one tablespoon at a time, making sure the butter is completely combined before adding the next piece.
- Knead the dough on low for 10 minutes. The dough should be shiny and elastic and slightly sticky.
- Transfer dough into an oiled bowl, cover with cling wrap and chill for at least 8 hours (24 hours is best). *See note below
Chocolate Filling
- In a small saucepan, add cream, butter, white sugar, chopped chocolate and sifted cocoa powder and mix until combined on medium/low heat.
- Remove from the heat and add vanilla extract and whisk in sifted confectioners’ sugar. The mixture should be somewhat thick. Allow to cool at room temp before assembling the babka. Alternatively, you can place in the fridge for 10 to 15 minutes to cool and thicken.
Assembly
- Prepared a 8 or 9 inch (20 or 22 cm) loaf pan, by greasing and lining with a parchment sling.
- Remove dough from the fridge and transfer to a lightly floured surface. Roll dough to a 12 x 16 inch (30 x 40 cm) rectangle. *Please note – the dough will not double in size as it rises in the fridge. This is normal.
- Spread an even layer of the chocolate mixture onto the dough, leaving a half inch (1.27 cm) border all around.
- Pick which method you would like to assemble your dough. You can also refer to photos in the body of the post. Method 1 – Tightly roll the dough into a log, starting on the shorter side. With the seam side down, cut the log straight down the middle exposing the layers and braid into a loaf. You may need to trim the ends a bit to fit in your loaf pan. Method 2 – Tightly roll the dough lengthwise into 1 long log and then cut into 2 equal pieces (about 8 inches or 20 cm long each). Place one log on top of the other, forming a cross and then twist onto itself.
- Transfer to a prepared loaf pan. Loosely cover with a tea towel and allow to proof for 1 to 1 ½ hours.
- Preheat the oven to 350ºF (176ºC) and bake for about 30 to 35 minutes. You’ll know it’s ready when an inserted toothpick comes out clean and you do not feel any resistance. *See note below
Simple Syrup
- When the babka has 10 minutes left of baking, we will make the simple syrup. In a small saucepan, add water and sugar and boil for a few minutes. It will become slightly thick as it cools.
- Brush all of the syrup onto the babka as soon as it comes out of the oven. Allow to cool in the pan for about 15 minutes and then remove the loaf and place on a wire rack to cool completely.
Chocolate Glaze
- Over a double boiler or in the microwave, melt butter, bittersweet chocolate and milk chocolate.
- Once completely melted, remove from heat and stir in corn syrup.
- Pour on top of the cooled babka loaf and allow the chocolate to set for 30 minutes before serving. Enjoy!
Notes
- Check on your babka after 20 minutes of baking. You may need to loosely tent your babka with foil if it has gotten too brown. Every oven runs differently, so it’s good to check.
- Homemade Babka is best when eaten the same day. Store any leftover babka into an airtight container at room temperature and enjoy for up to 2 day. Although, even after the 3rd day, my babka was still really soft.
- I used a cast iron loaf pan by Lodge, but any metal pan will work. Do not use glass or ceramic.
- If you want a taller loaf, use an 8-inch pan (20 cm).
- When the dough ‘rises’ in the fridge, it will not double in size so don’t fret when you see it the next day. This is normal.
- If you decide to assemble the dough using method 1, the chocolate glaze is optional. I tried it without the chocolate glaze and it was delicious and pretty gooey because the chocolate layers are exposed.
If you have made this recipe, I would love to know how it turned out for you! Please consider leaving a star rating and review below and tag me on Instagram @shortstackkitchen. Thank you so much!
Leave a Rating and Comment